Toyota RAV4 Dashboard Speaker Upgrade (Step-By-Step)
If you don’t have the premium audio package in your Toyota RAV4, you know how bad the speaker system is!
One of the easiest upgrades for your RAV4 is replacing the dashboard speakers with something high-quality.
In this article, I’ll teach you how to replace your stock dashboard speakers with JBLs. This is very easy to do (anyone can do it), affordable, and makes a huge difference.
This tutorial is written for the 2019-2022 Toyota RAV4. If you own a 2022, please see the important note in the “Materials Needed” section.

Affiliate Disclosure:
As an Amazon Associate we earn from qualifying purchases at no additional cost to you. Thank you for supporting our website.
My Thoughts On This Upgrade
The speakers in the RAV4 are not great and can benefit from an upgrade. At first, I was hesitant about upgrading my speakers because I’d never done such a thing before. I thought it will be complicated and difficult to do.
After learning more about the dashboard speakers, I realized how easy it was to upgrade, so I purchased these speakers right away.
The difference in sound quality is fantastic! I wish I would’ve discovered this upgrade sooner. Installation was extremely easy (as you’ll see below).
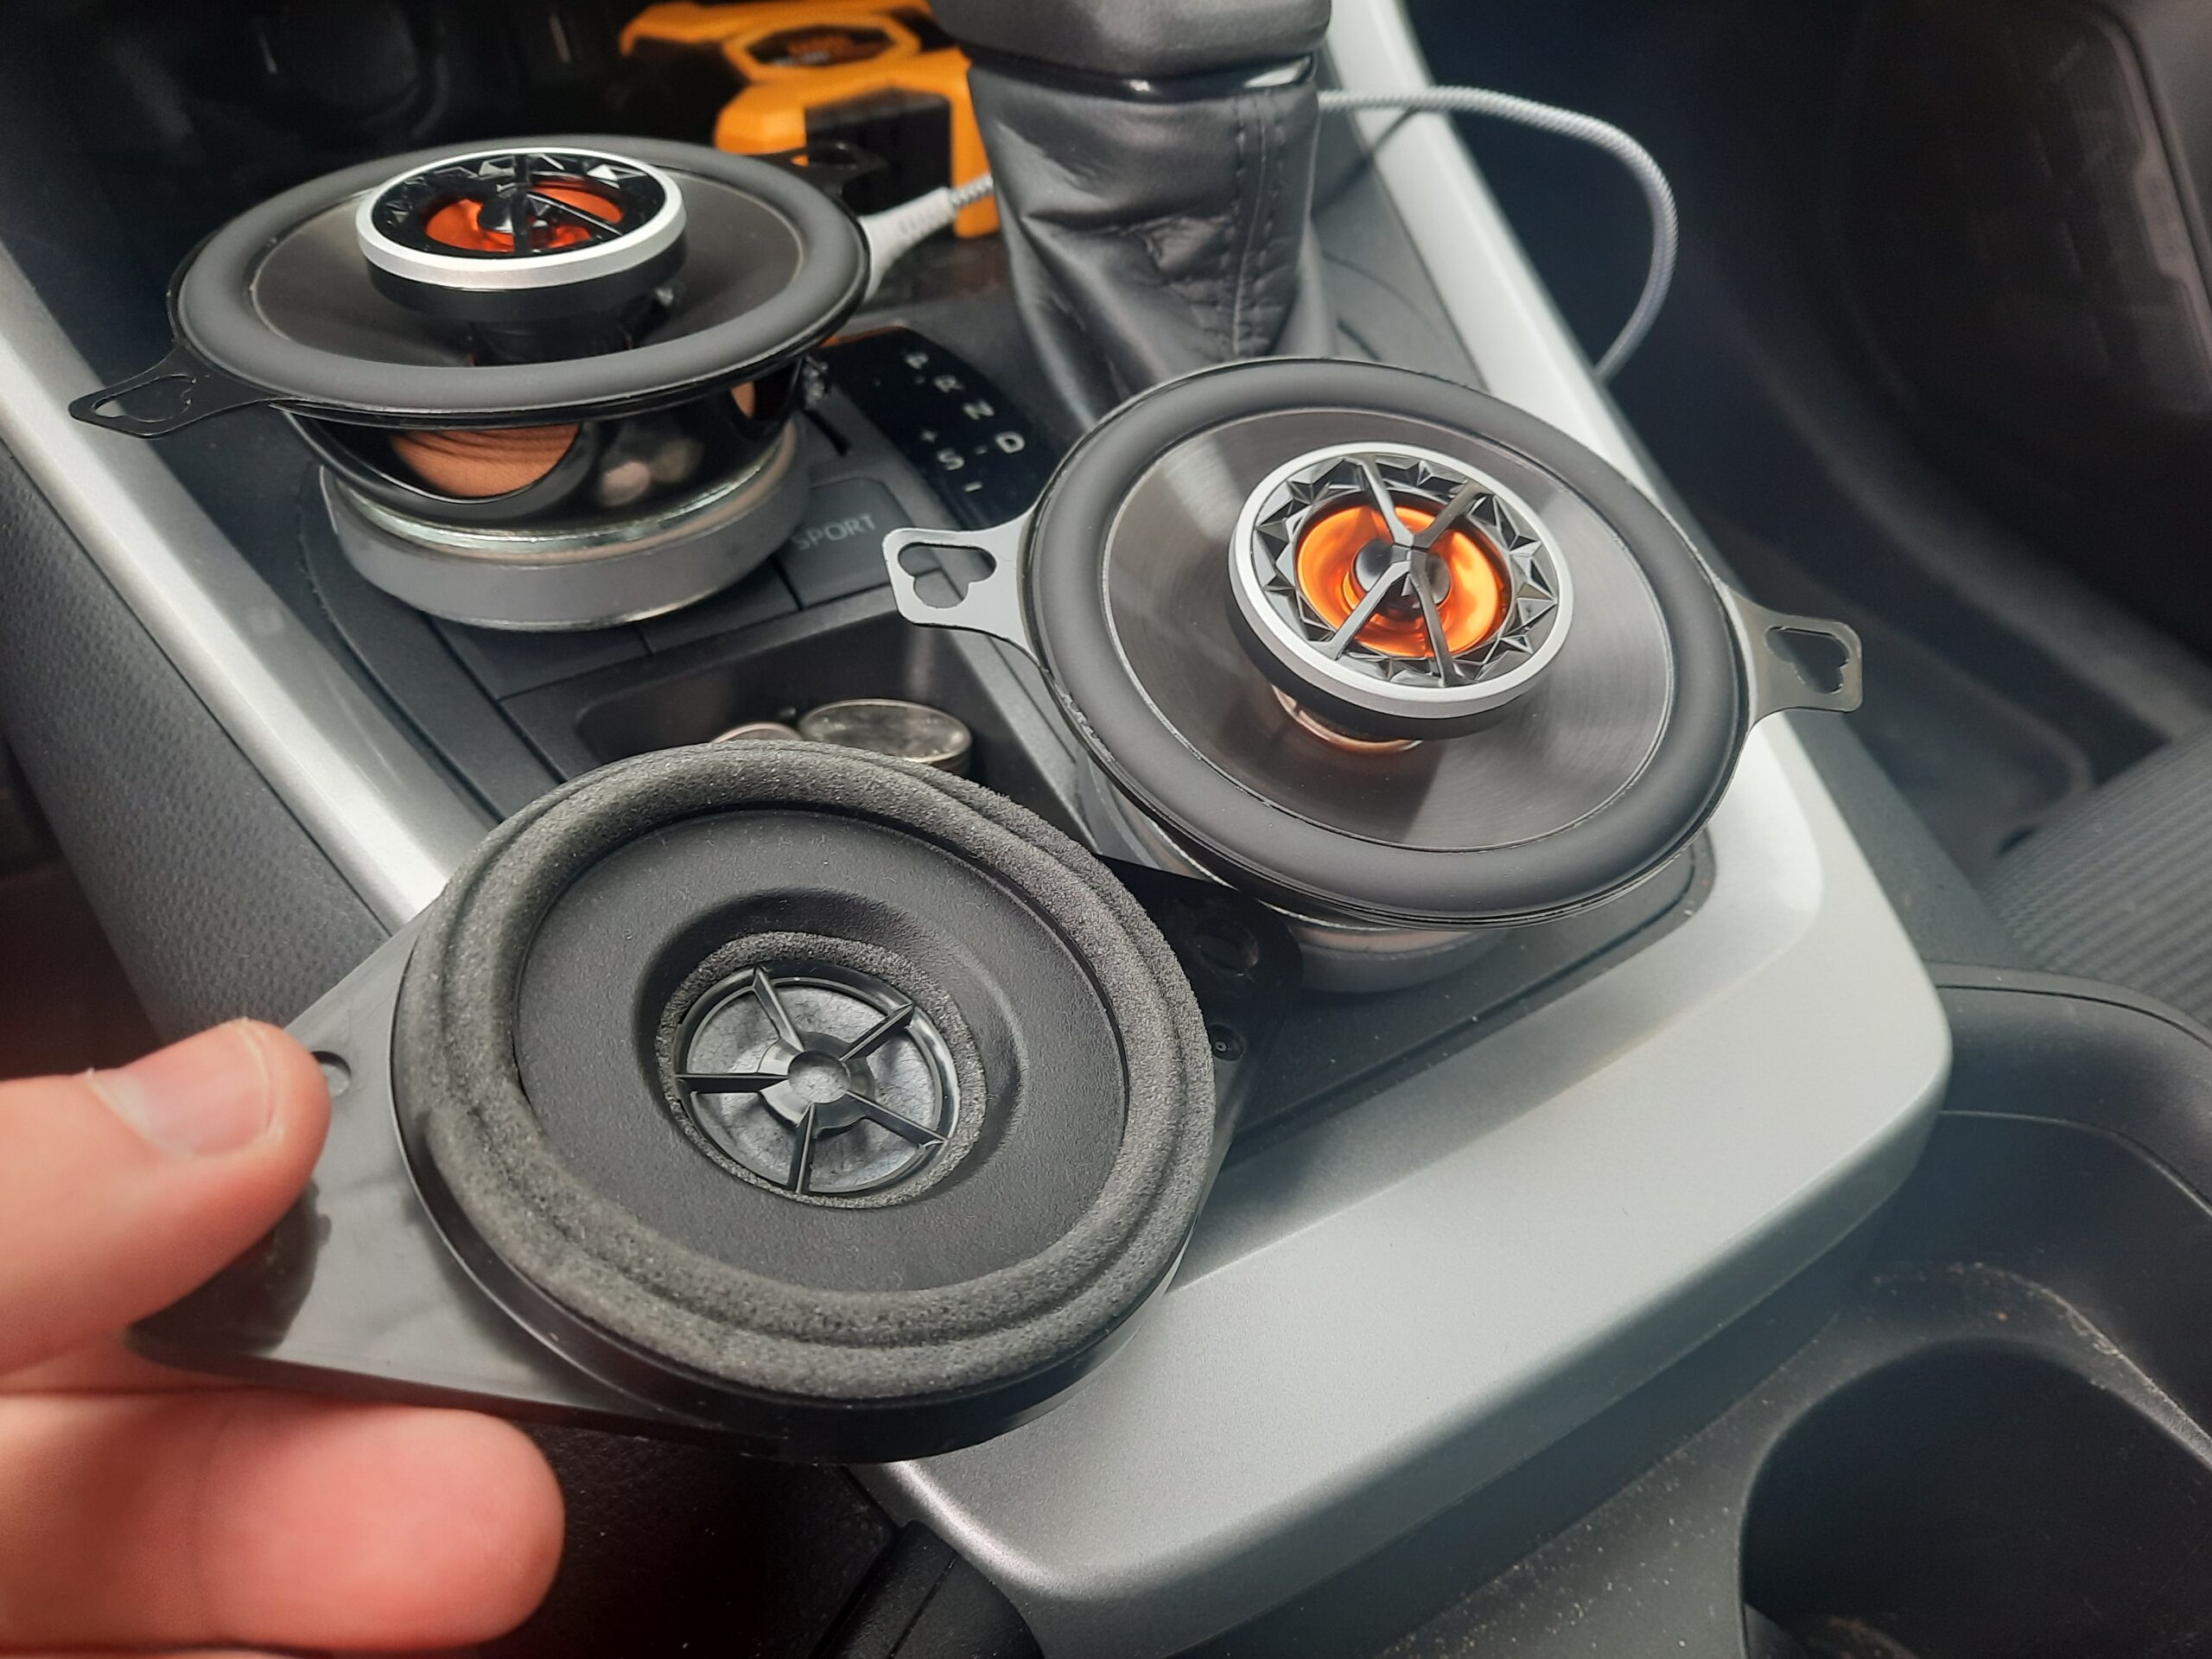
When taking out the old speakers, you can tell how low-quality they are. These new speakers are heavy and well-built and the old speakers feel like cheap, lightweight plastic.
Take at look at these photos comparing the old and new speakers.

The only downside that I’ve noticed with these speakers is that they do not perform well at loud volumes in cold weather. When turning the volume high with temperatures below freezing, there are some occasional pops or static. However, it is totally fine at low and medium volumes, and the issue resolves once the interior of the vehicle warms up. It is mostly a minor inconvenience.
Materials Needed
Before getting started, you’ll need the following materials:
- Two JBL CLUB3020 3.5″ speakers
- Red Wolf wiring harness (see important note below if you have a 2022 RAV4)
- 10mm wrench
- Plastic wedge or screwdriver (plastic wedge recommended)
Import note for 2022 RAV4 owners:
2022 RAV4 owners reported that the Red Wolf wiring harness is not the correct polarity. Therefore, you would need to modify the polarity to make the wiring harness work.
If you do not know how to reverse the polarity of a wiring harness, you may need to skip this tutorial and take your RAV4 to an accessory shop instead.
When I find a 2022-compatible wiring harness, I will update this tutorial.
2019-2021 RAV4 owners DO NOT need to worry about this.
Step-By-Step Installation
1. Locate the Speaker Cover
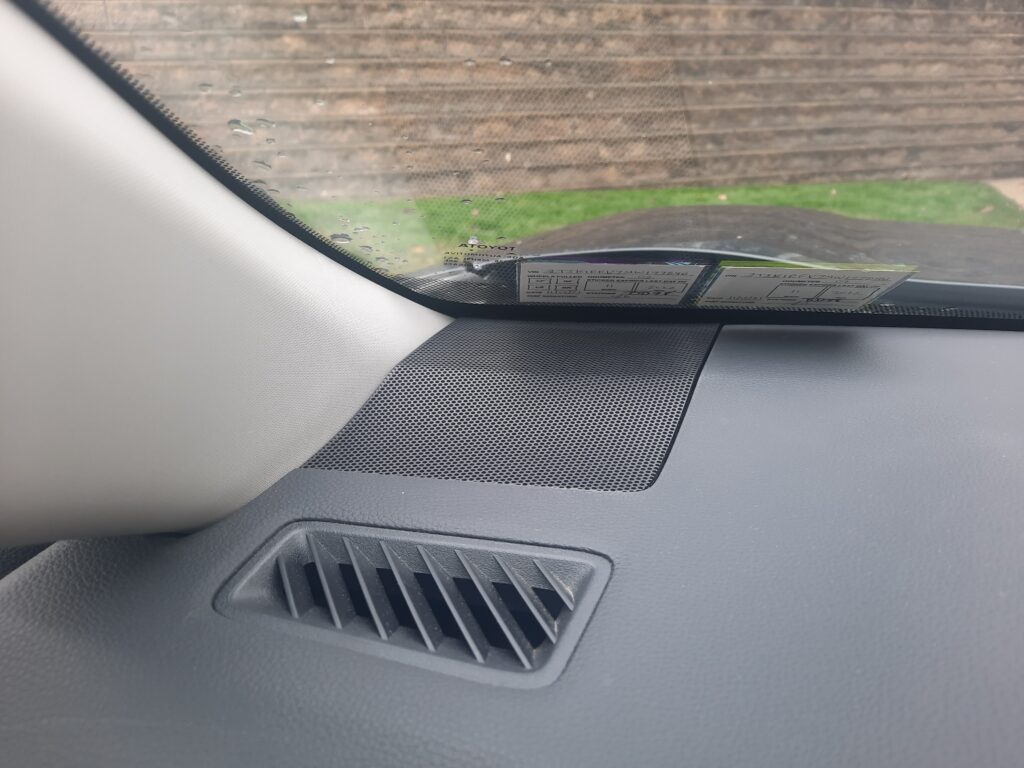
Start by locating the speaker cover.
There are two speakers, each at the bottom corner of the windshield.
2. Pop the Speaker Cover Open
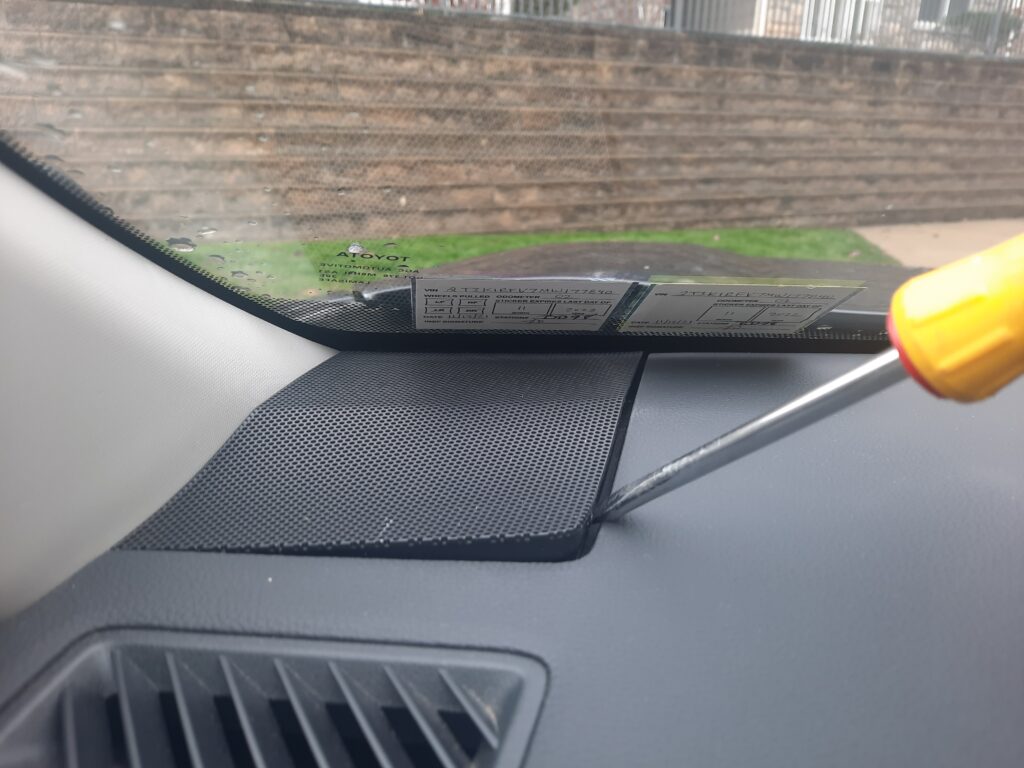
Pop the speaker cover open with a plastic wedge or screwdriver.
I use a screwdriver here, but I highly recommend using a plastic wedge to avoid scratching you car.
3. Remove the Speaker Cover
Remove the speaker cover by lifting up and pulling it towards you.
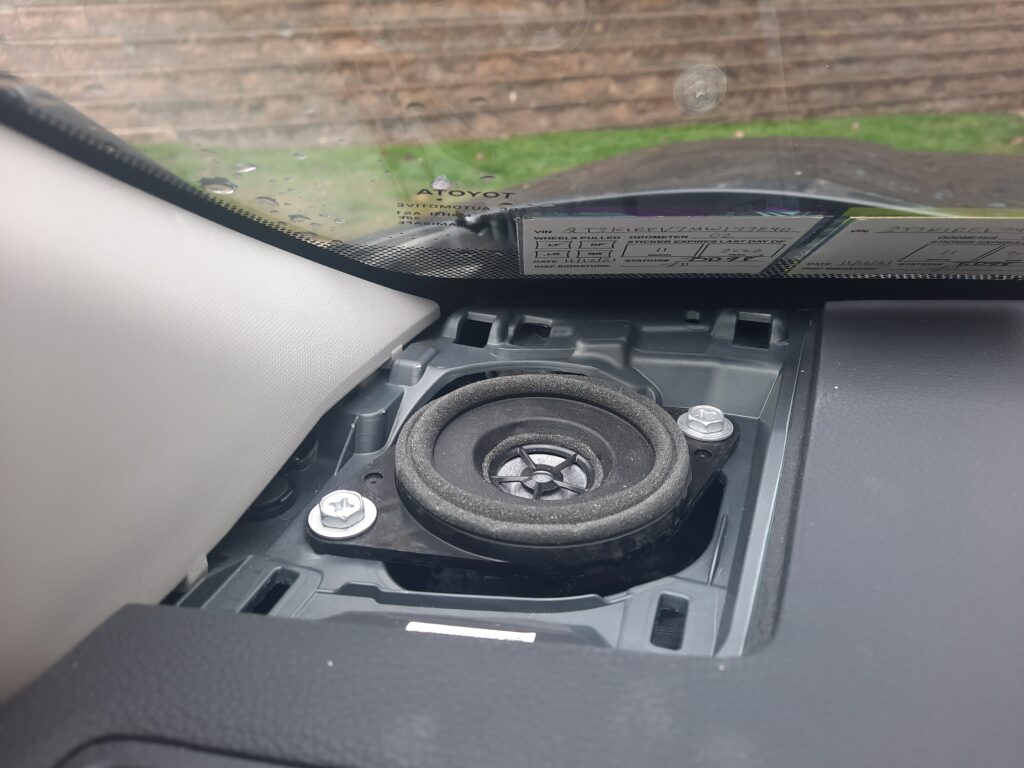
4. Remove Bolts From the Old Speaker
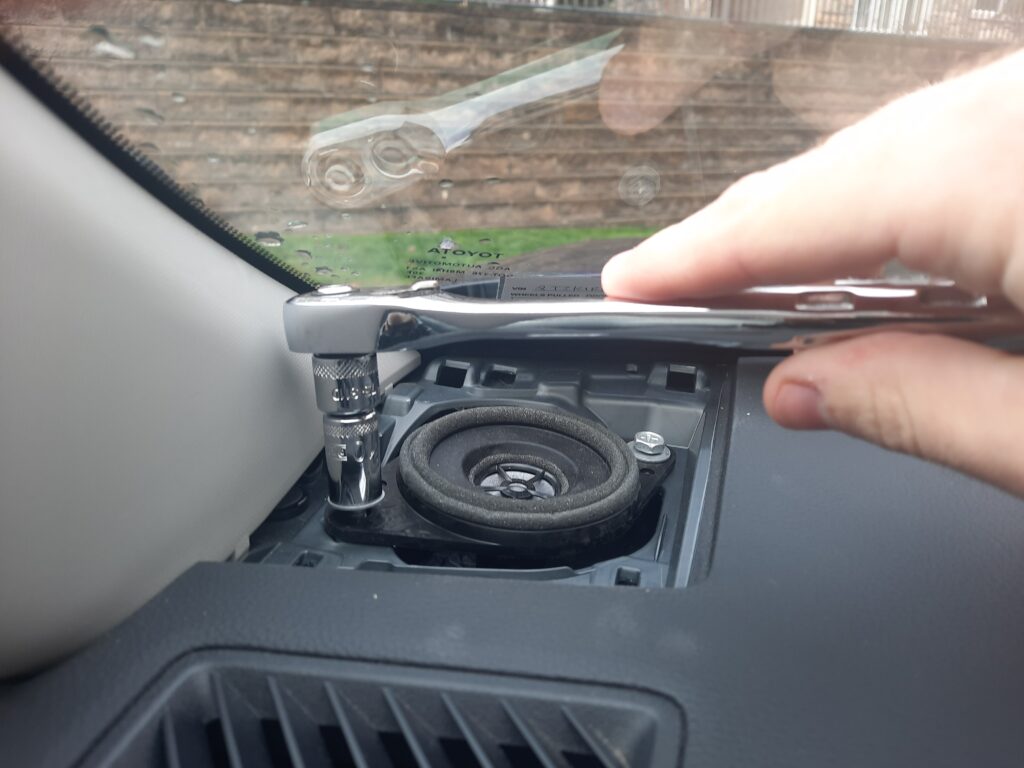
Use a 10mm wrench to remove the bolts.
We’ll need these to reinstall the new speakers, so don’t lose them.
5. Detach and Remove the Old Speaker
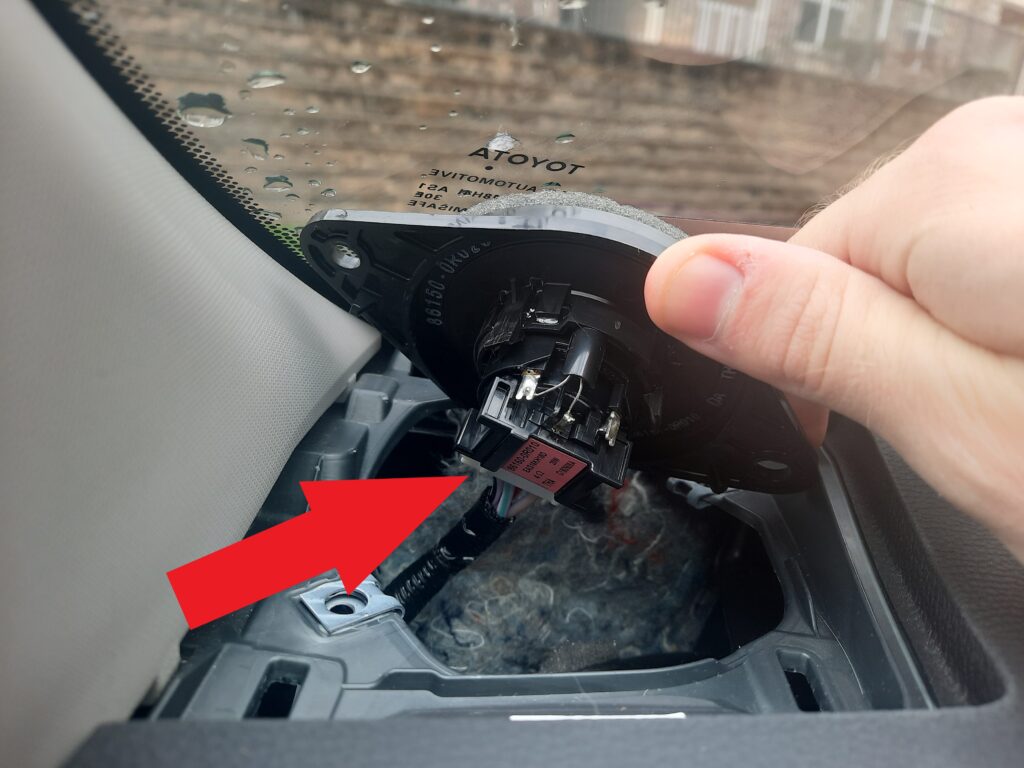
Detach the connector from the back of the old speaker, then remove the older speaker.
There is a tab that you’ll need to depress to release the connector. It might be difficult to do, but eventually you’ll get it released.
6. Attach the New Wiring Harness to the New Speaker
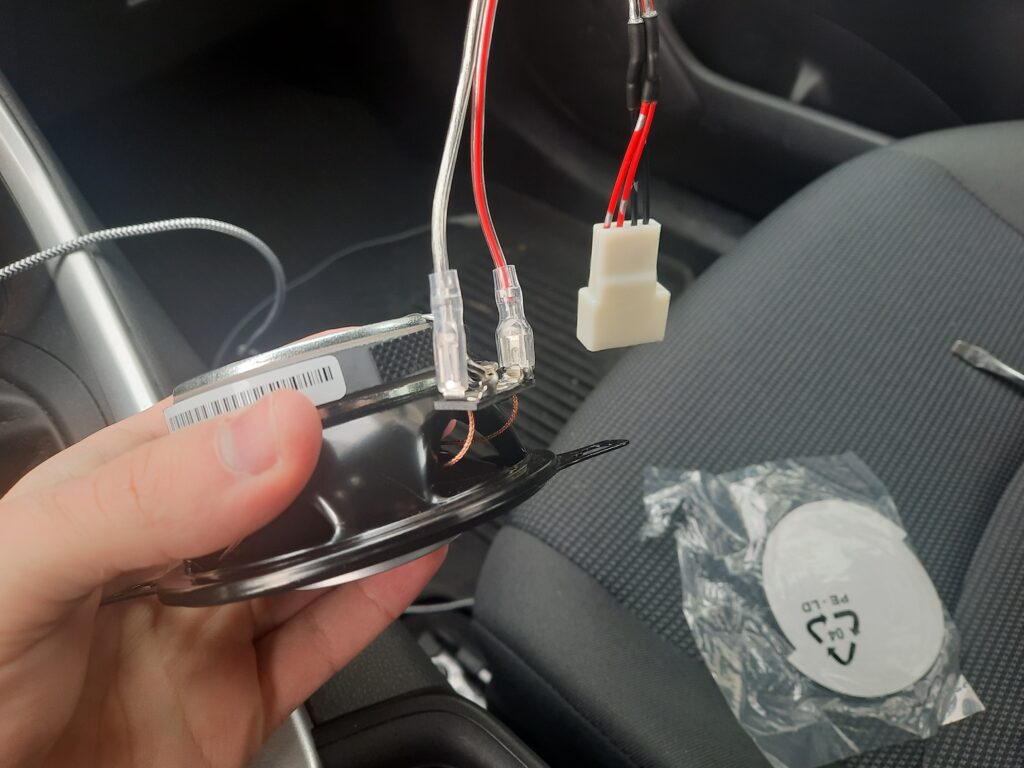
Attach the wiring harness to the speaker connections.
The connectors are different sizes, so you’ll know which wire to attach to each side.
7. Connect the New Speaker to the Car
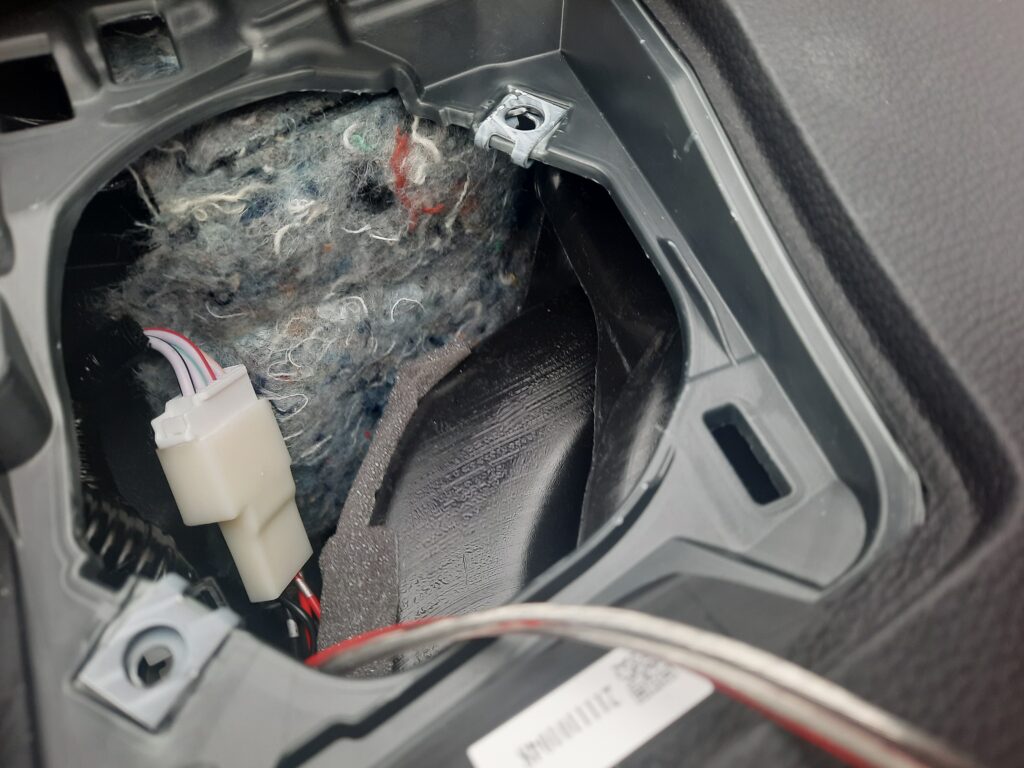
Plug the wiring harness into the car’s connector, as seen below.
You’ll need to tuck this connector down as far as possible.
8. Position the New Speaker
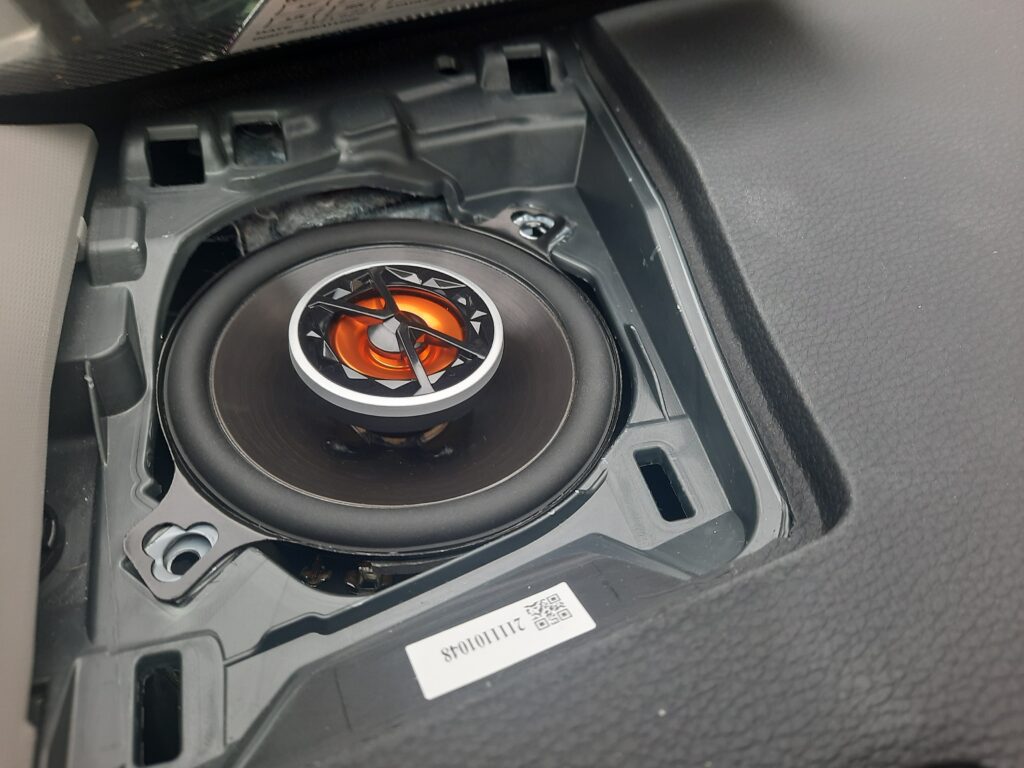
Position the new speaker in the dashboard slot.
Make sure the speaker is proper seated and aligned with the bolt holes.
9. Reinstall the Bolts
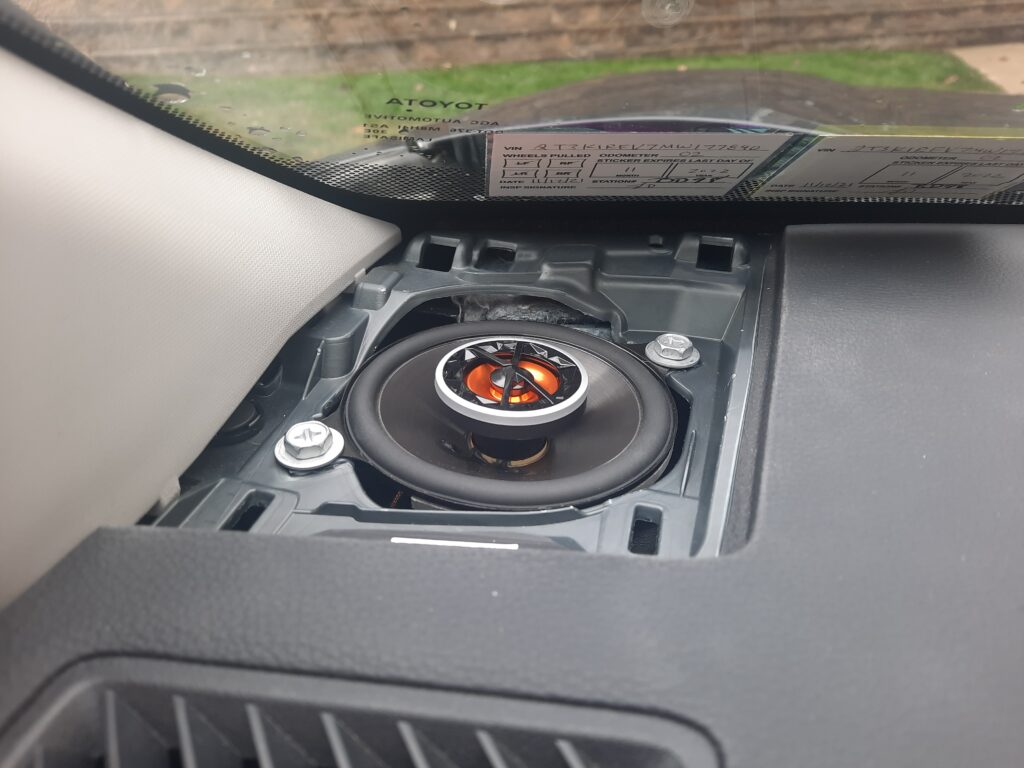
Reinstall the bolts to secure the speaker in place. Do not over-tighten the bolts.
10. Replace the Speaker Cover
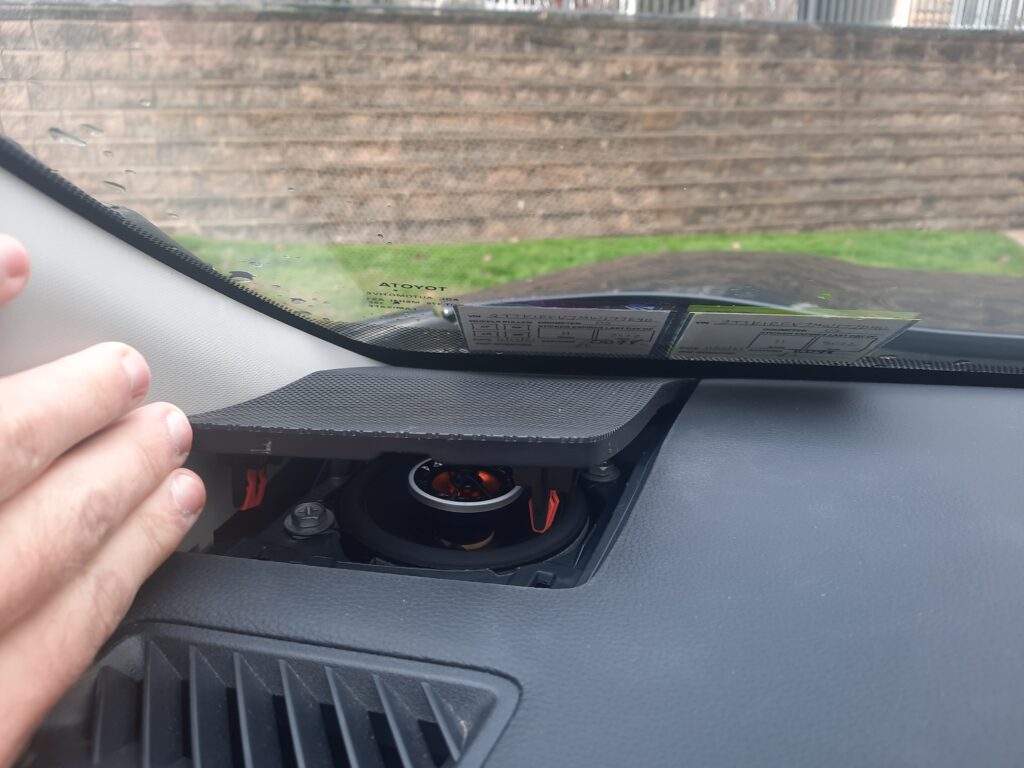
Slide the speaker cover back into place, then press down to snap it back together.
Repeat these steps for the other dash speaker!
You’re finished!
Congrats, you’re Toyota RAV4 dashboard speakers are now upgraded.
If you experienced any issues with this tutorial, please contact me so I can correct it. I’m happy to help with any other installation questions as well.