Toyota RAV4 LED Interior Lights Upgrade (Step-By-Step)
Are you struggling to see your RAV4’s interior when it’s dark?
I understand. The interior lights that come with the RAV4 are very underwhelming. They simply don’t get the job done.
There’s been many times where I’m searching for something in my car and I need to use my phone’s flashlight because the interior lighting is so bad.
That’s why an LED interior light upgrade is one of the most popular modifications done by Toyota RAV4 owners. I think everyone should consider doing this to their RAV4.
Here are some photos of how it turned out:

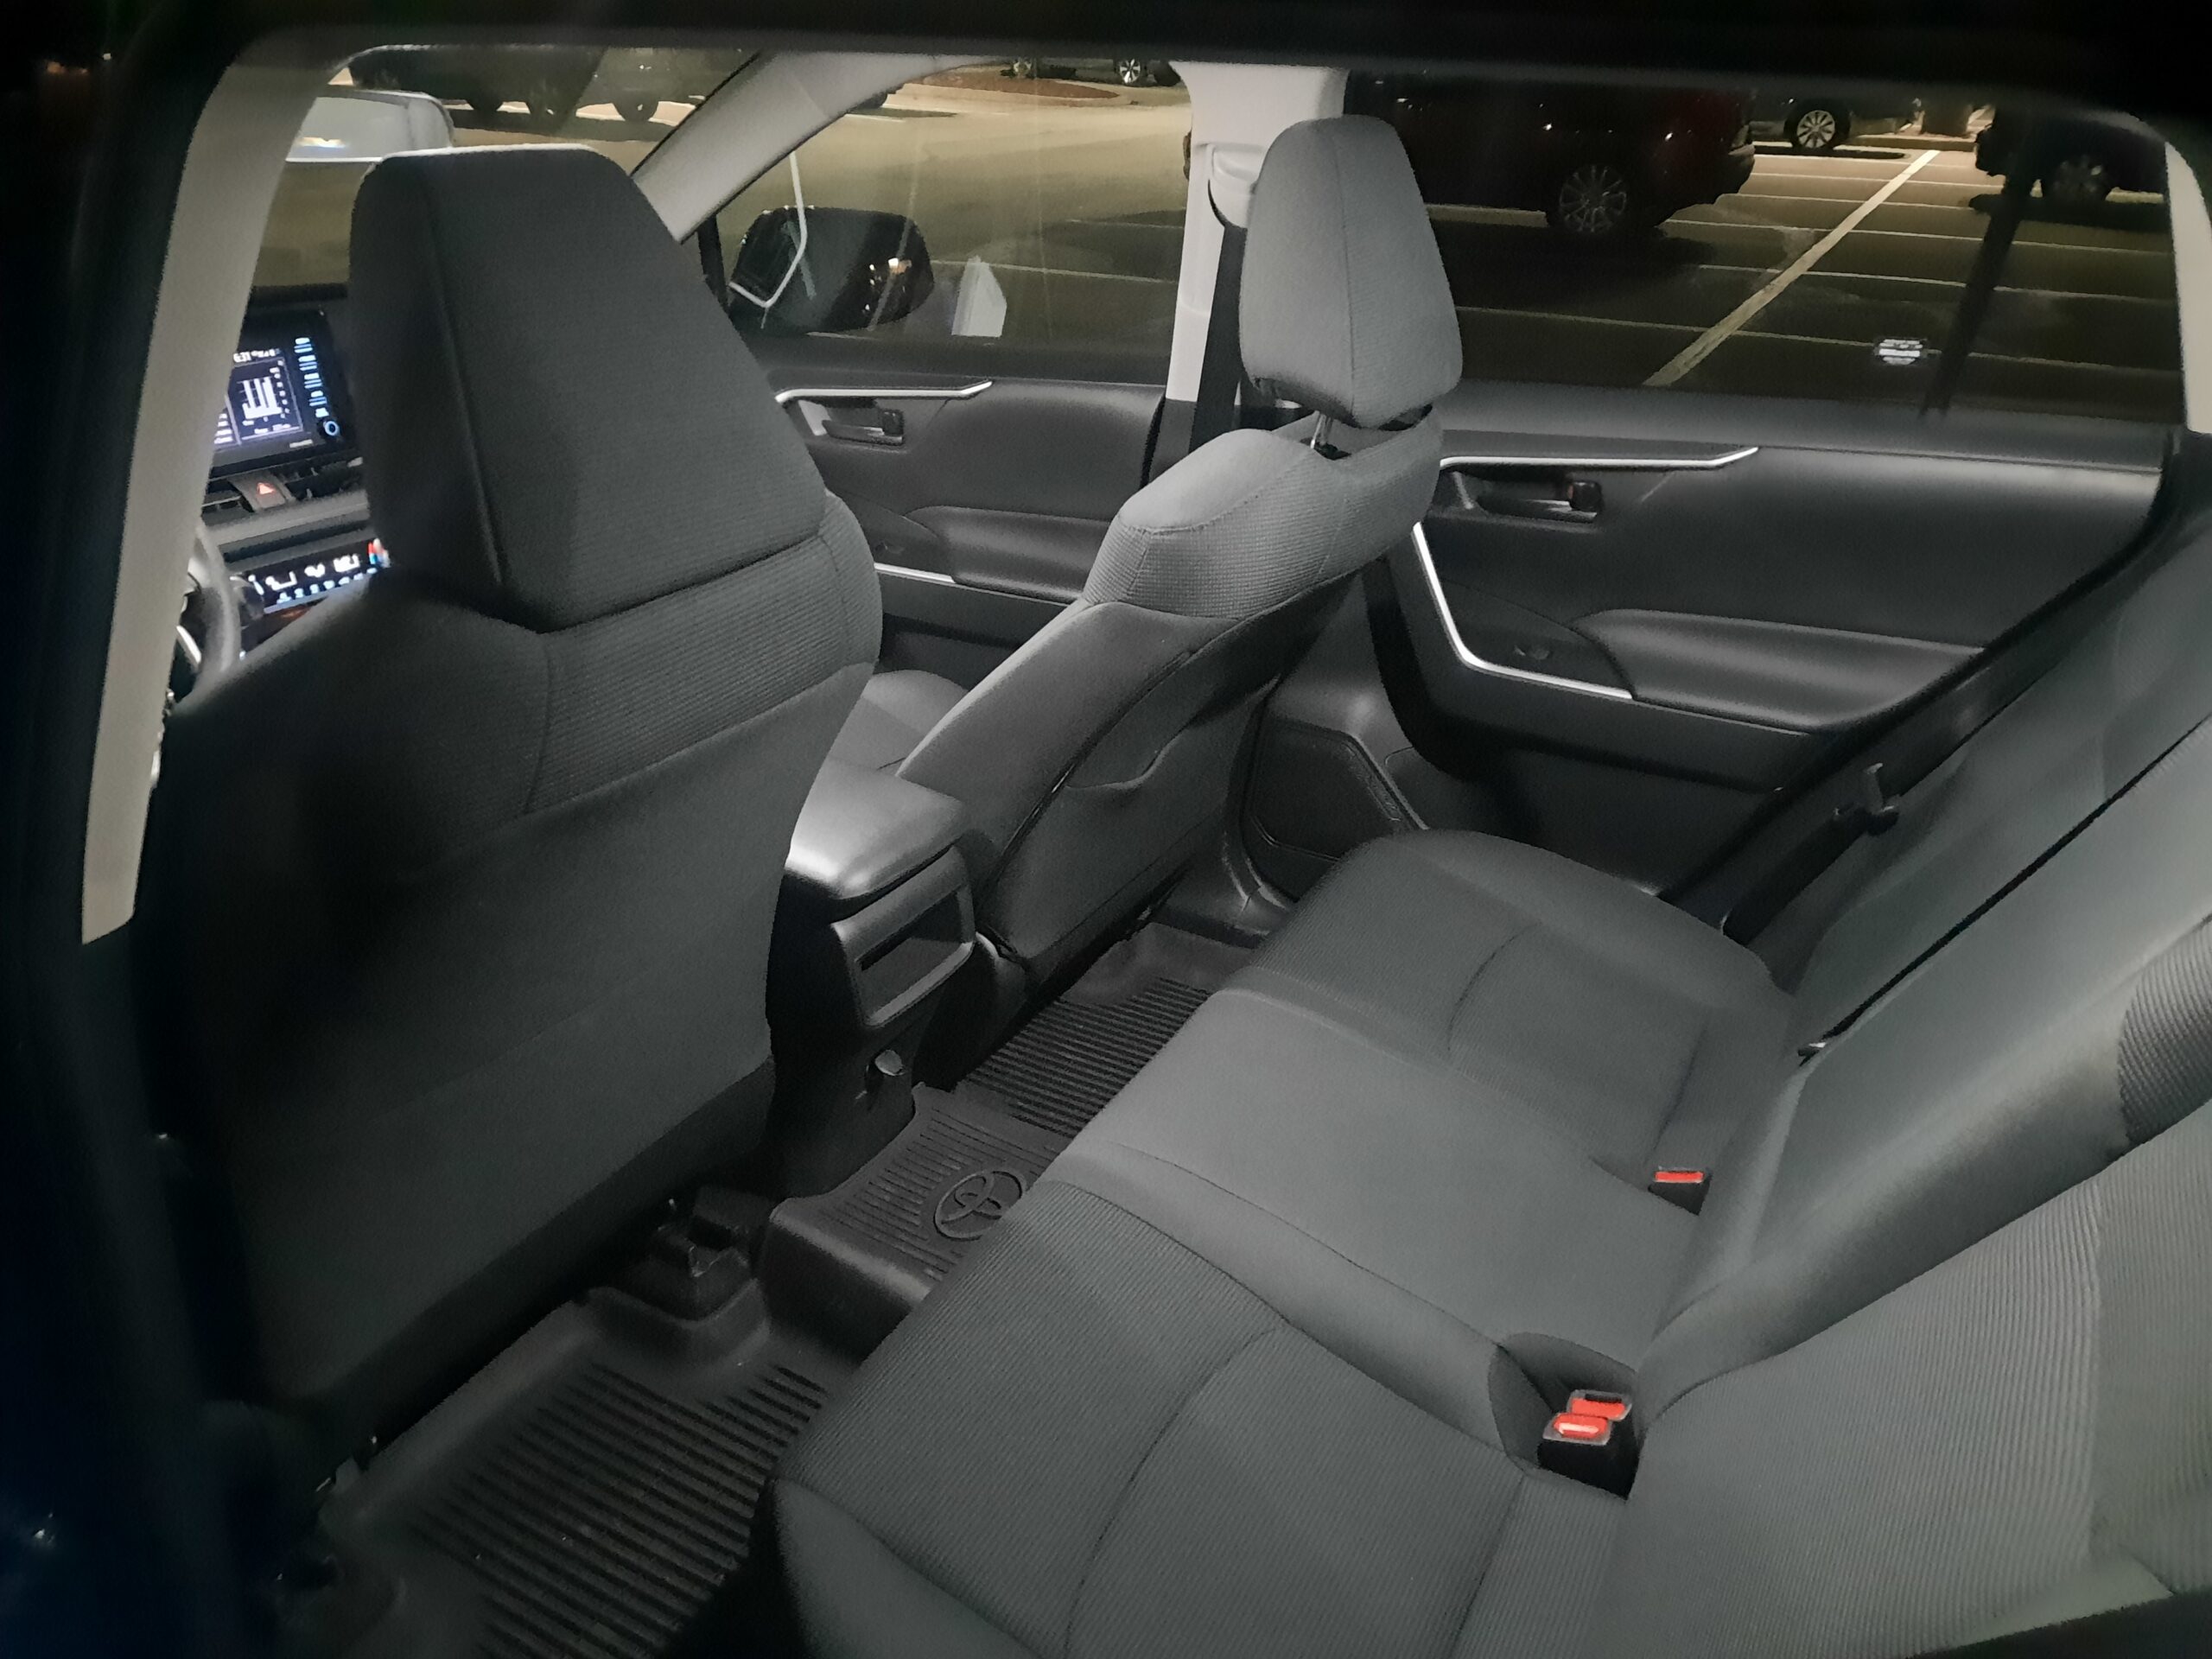
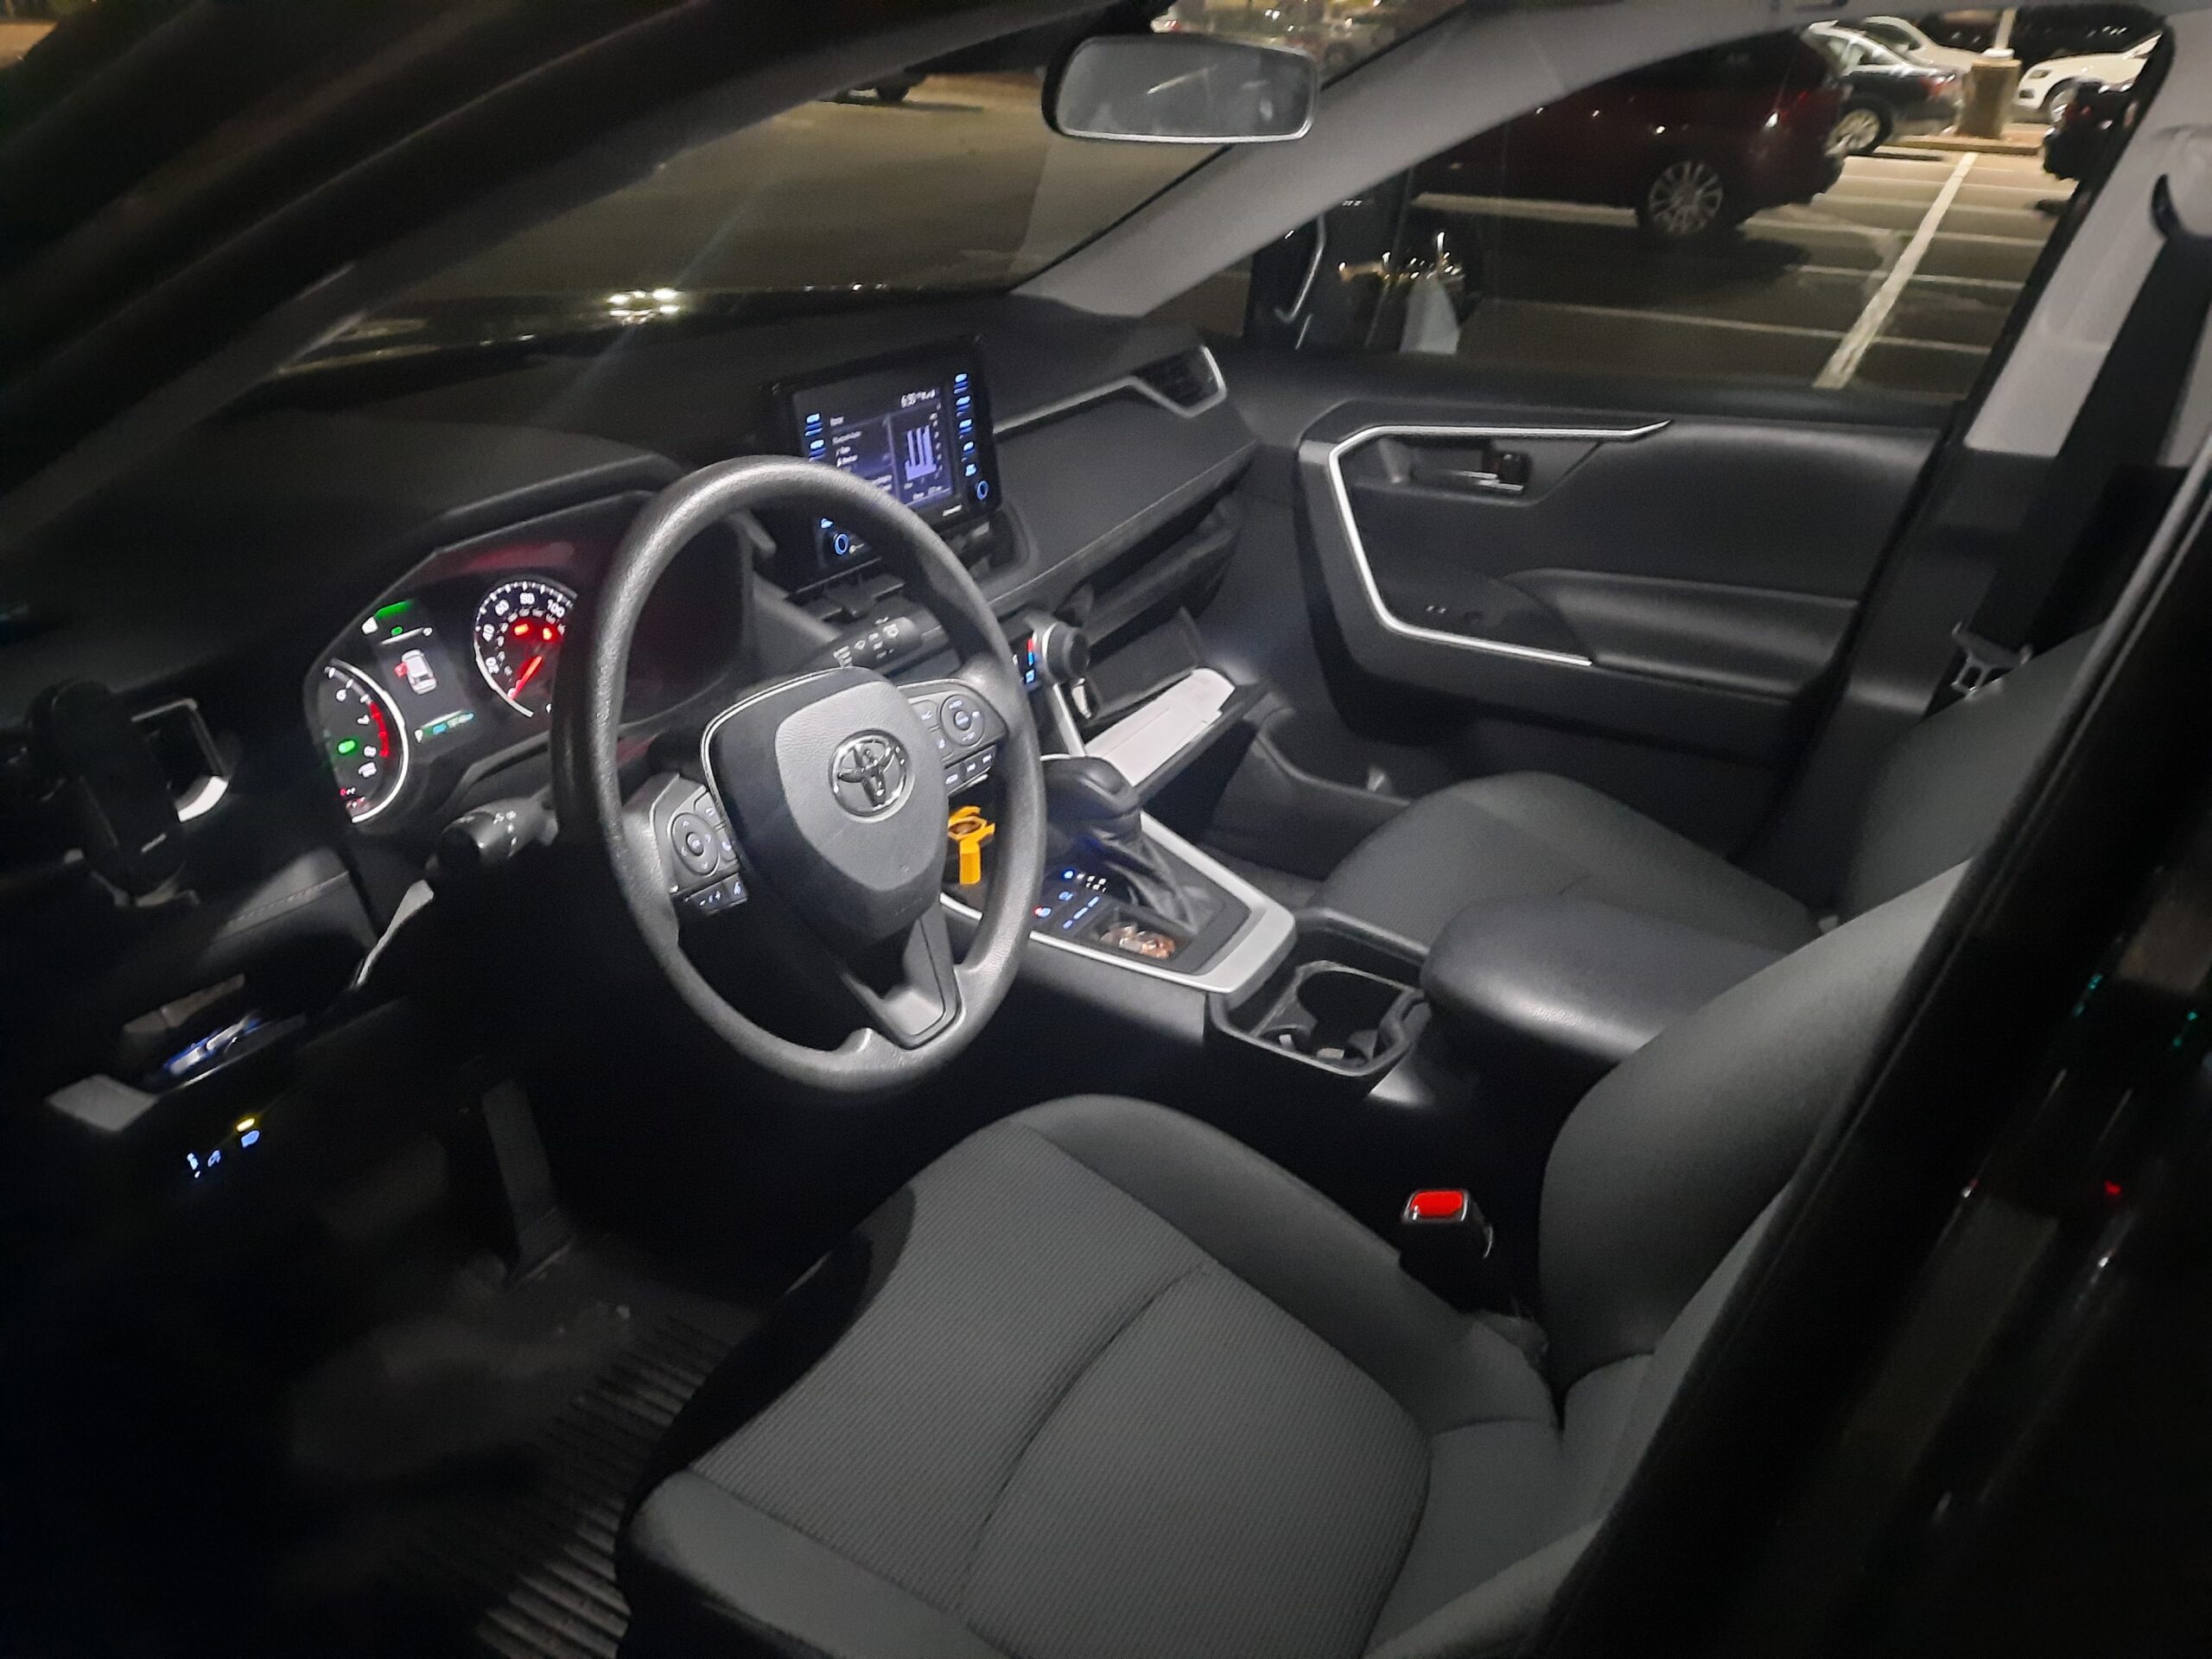
Much better!
To guide you along the process, I’ve documented every step of the installation.
Pay close attention, as there are some important things you should know to avoid breaking your map lights
Note: This tutorial was created using a 2021 Toyota RAV4 LE. Your vehicle may vary slightly depending on model year, especially for RAV4s that are 2015 or older.
Affiliate Disclosure:
As an Amazon Associate we earn from qualifying purchases at no additional cost to you. Thank you for supporting our website.
Purchasing the Kit
Before getting started, you’ll need to purchase the interior LED kit.
I recommend the Autogine brand. This is the kit that I personally use in this tutorial.
There are two different kits available depending on your model year. Click the appropriate product below to purchase it on Amazon.
2016-2024 Toyota RAV4

2006-2015 Toyota RAV4

Installing the Lights
If you’re ready to install your new LED lights (or perhaps you just want to see process before purchasing), keep reading.
Below, I’ll break down each step of the installation process so you know exactly how to install each light.
Important note: Installing the map lights is the most difficult part of this process. I’m going to start with the easy steps, then I’ll deal with the most difficult step last.
Materials Needed
If you ordered the led kit that I mentioned above, you should have:
- 8 LED lights
- Plastic wedge
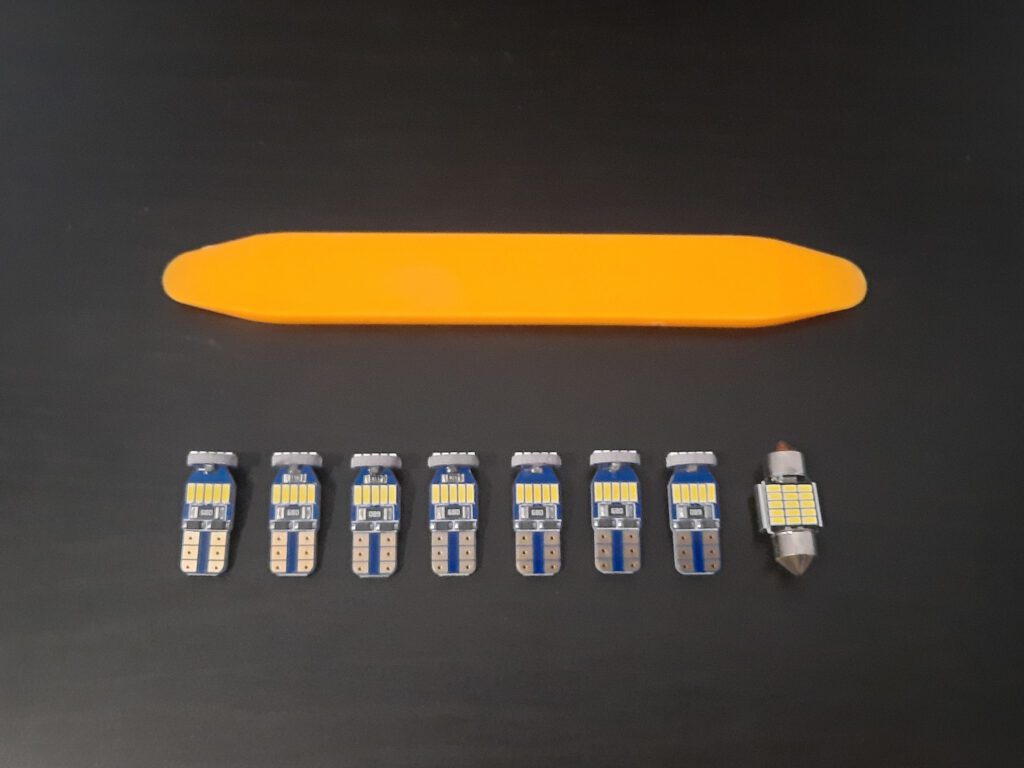
Note: This kit also includes 2 lights for the license plate. I will not install the license plate lights in this article, since this tutorial is focused on the interior lights. Personally, I don’t believe it is worth upgrading the license plate lights. I recommend saving these extra lights if you need a replacement in the future.
1. Installing the Visor Lights
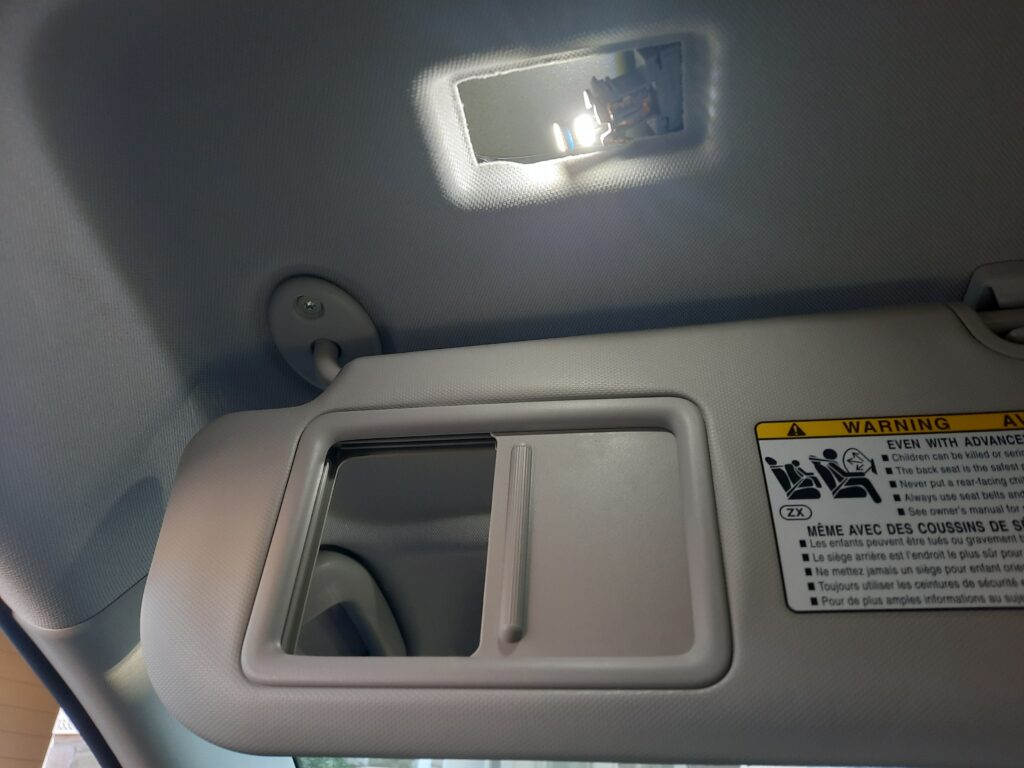
Let’s get started by installing the two visor lights.
These are located behind each visor and turn on when you slide open the mirror cover.
To remove the cover, insert the plastic wedge on the left side of the cover. You should insert on the left side of the cover for BOTH visors, as seen below.
Insert the plastic wedge into the light cover and pry it open. Don’t worry, you will not break it.
Once the visor light cover snaps open, continue to pull down on the left side to reveal the bulb.
Optional: To make it easier to remove the bulb, I recommend releasing the “U”-shaped clip holding the cover in place. See the photo below.
Once the bulb is exposed, simply pull it outward to remove it. You may need to wiggle it out of place. Do not twist.
Once the old bulb is removed, insert the new LED into the slot.
Before reinstalling the cover, test the new LED to make sure it works by opening the visor mirror.
If the bulb does not work, remove it, flip it around, and insert it in again (reversing the polarity).
Once you’ve confirmed that the new light works, reinstall the cover and repeat the steps on the other visor light.
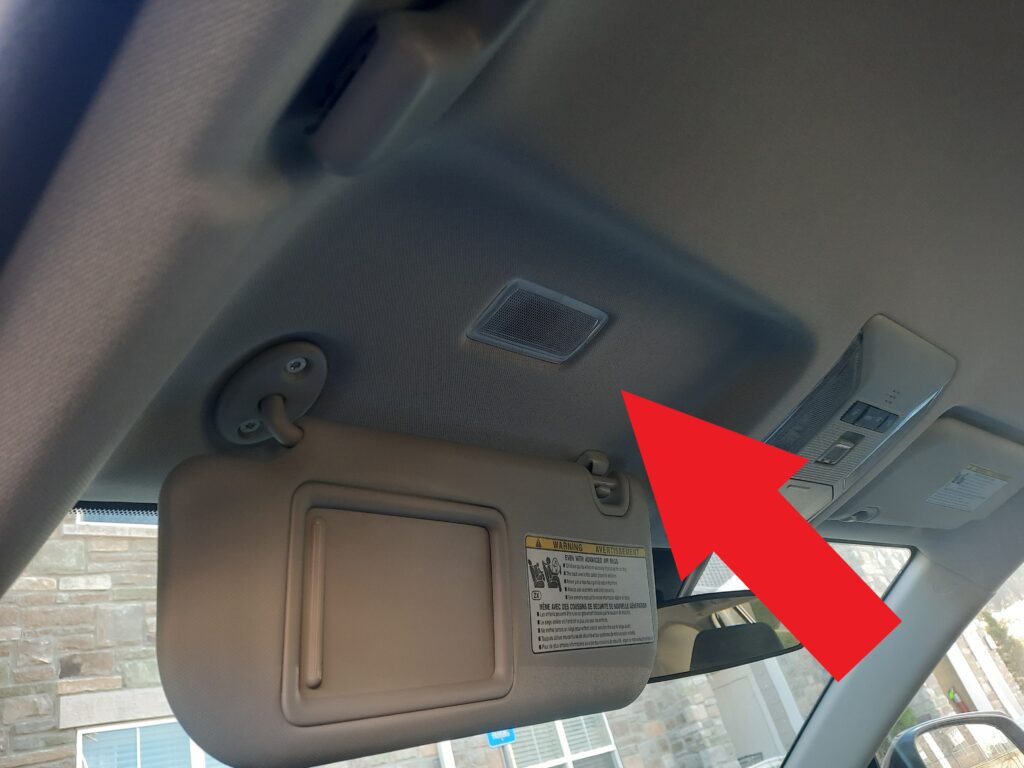
2. Installing the Dome Light
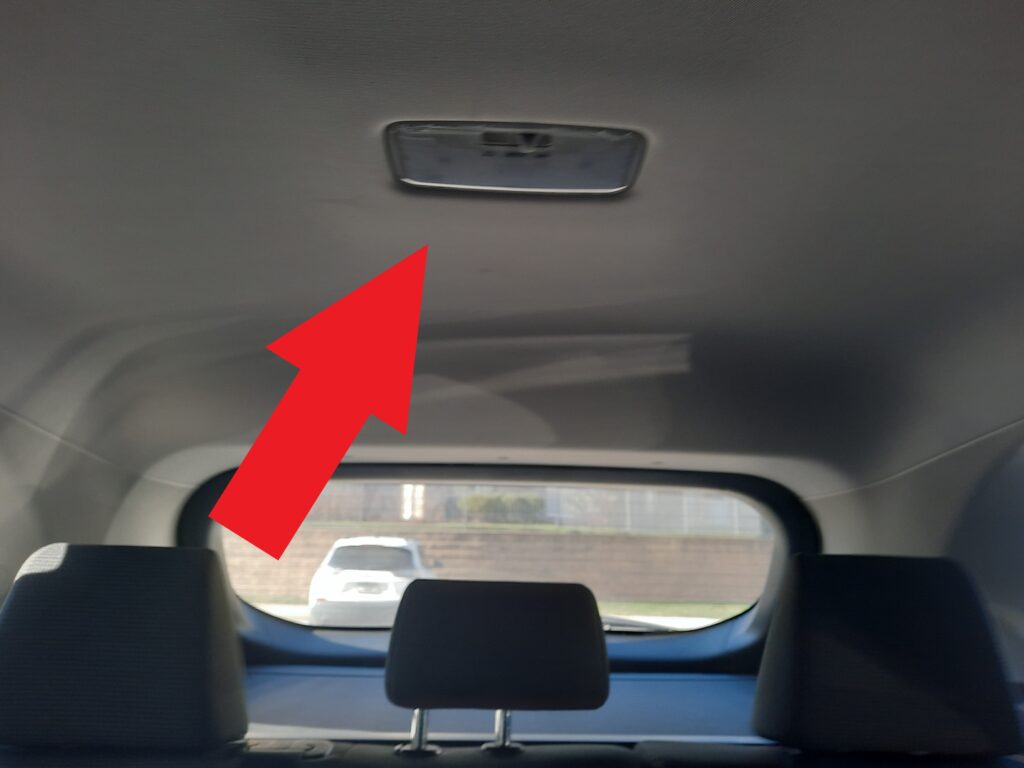
Next is the dome light. This is located above the rear passenger seats.
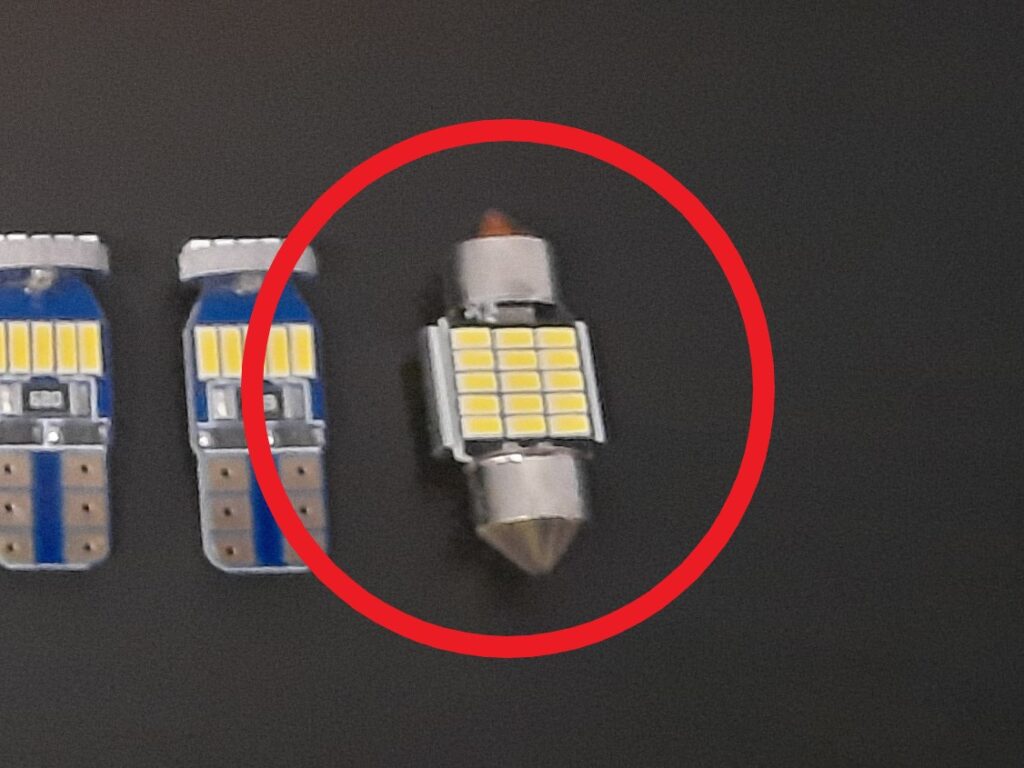
For the dome light, you’ll be using the LED circled in the image below.
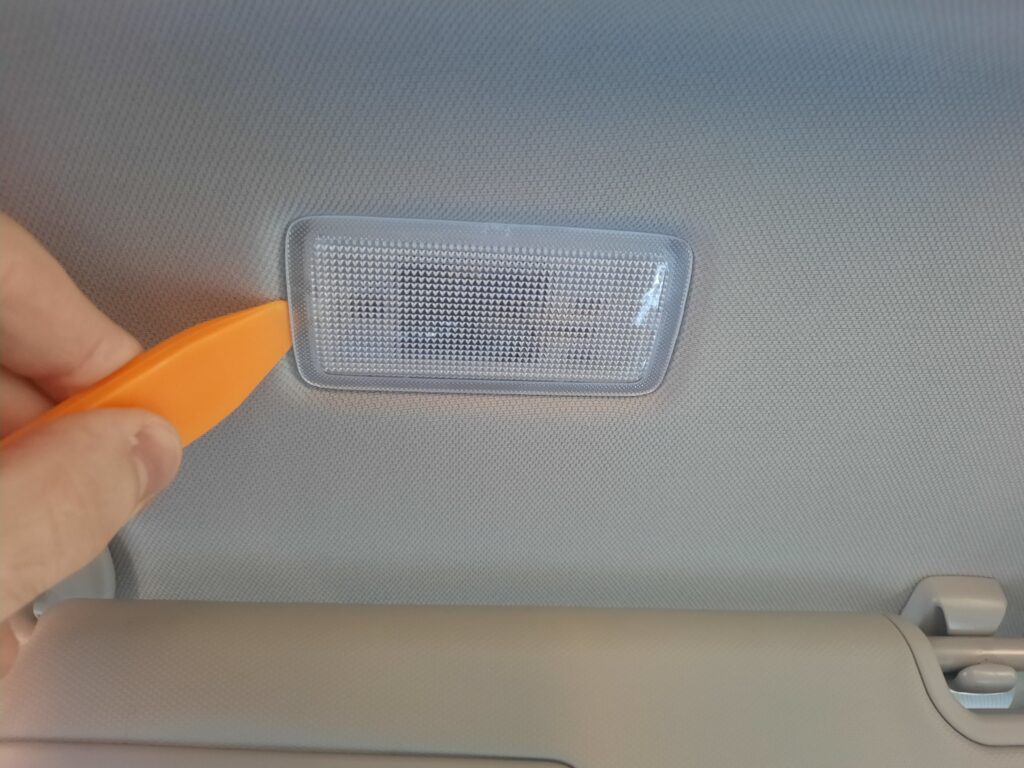
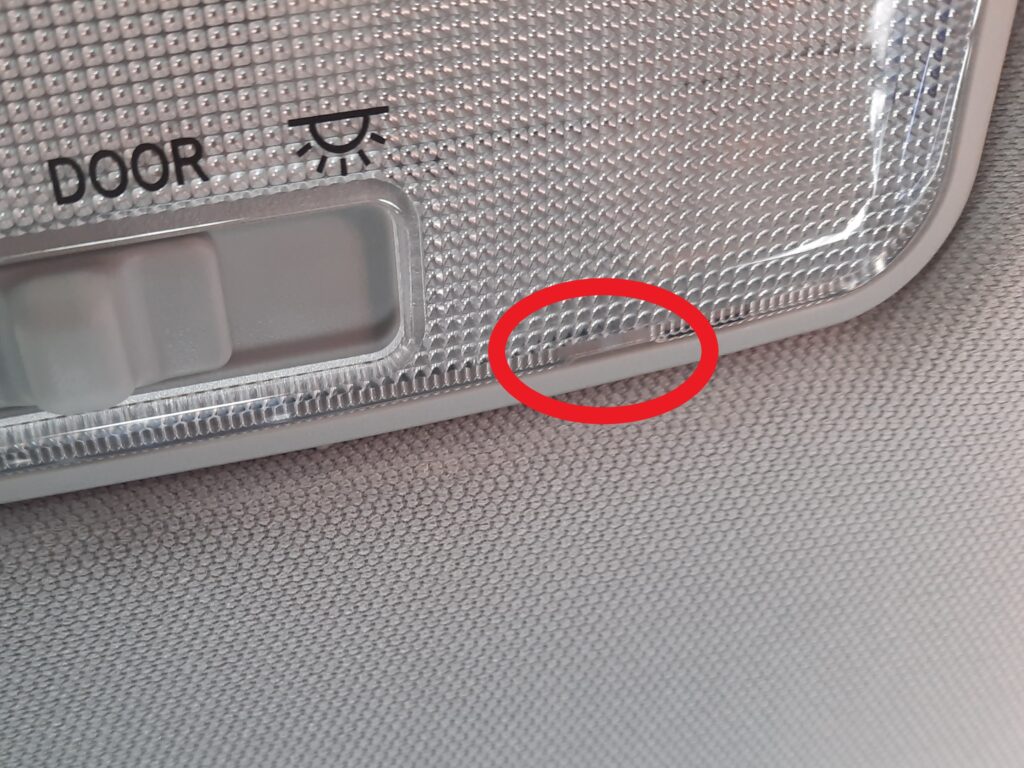
To pry open the dome light, you’ll need to locat two small notches on the cover. They are located on the bottom of the cover.
I’ve circled one of them below. They are hard to see, but easy to feel with your fingernail.
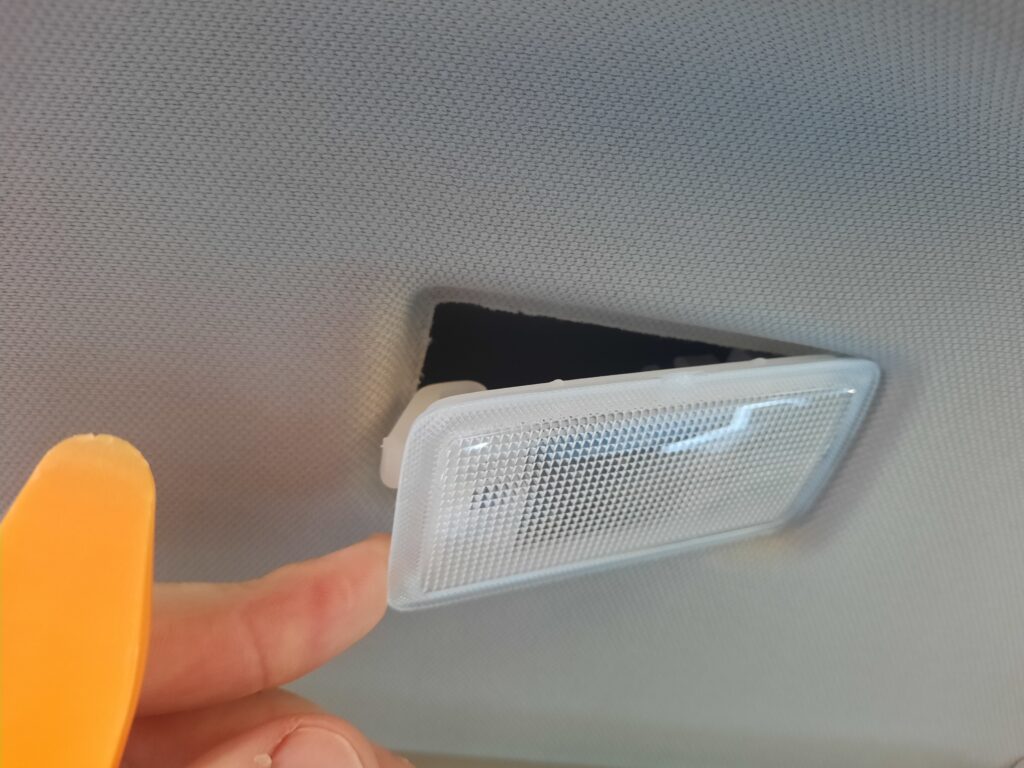
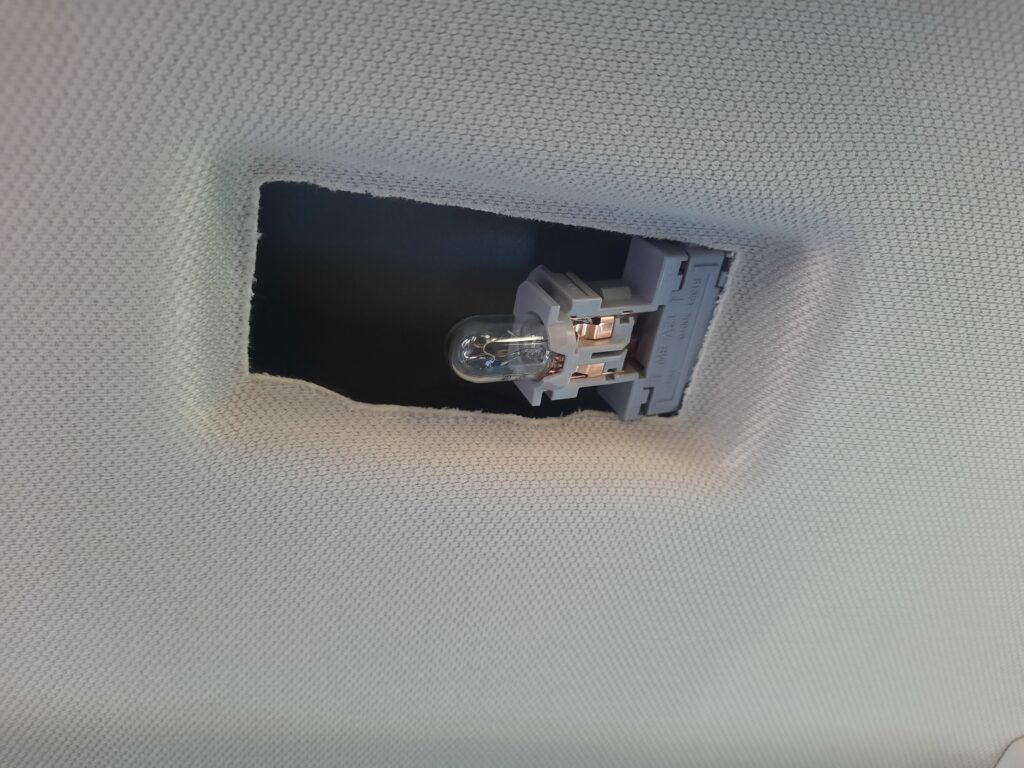
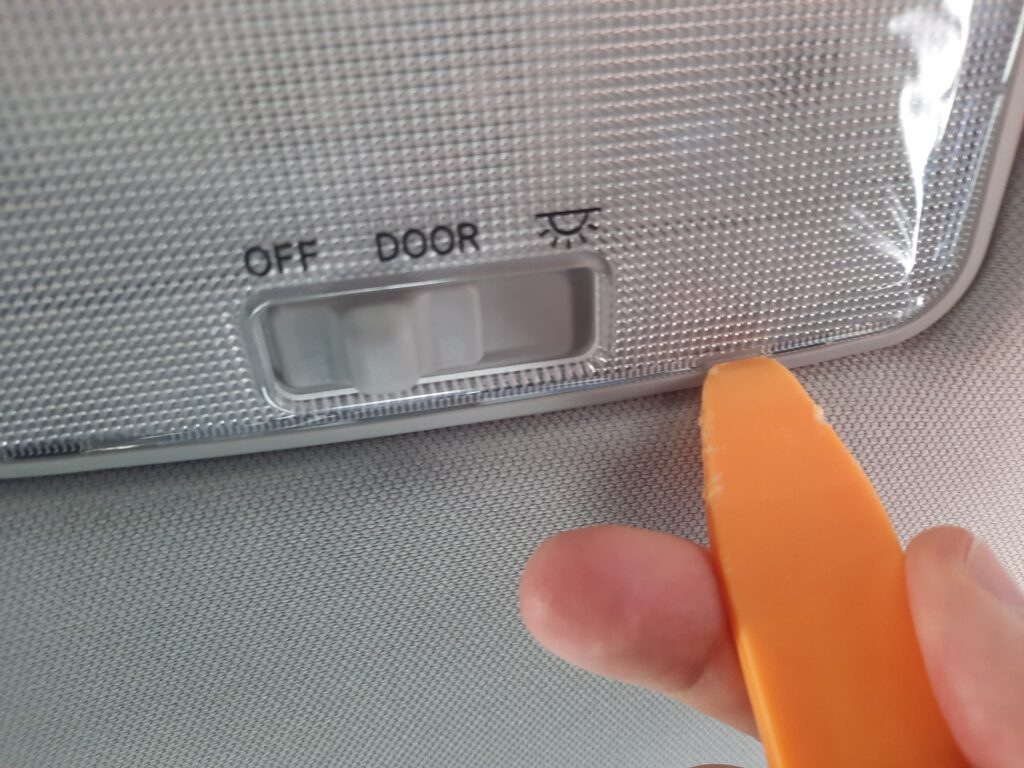
Use the plastic wedge to pry open the dome light cover. Pry open each notch and the cover should easily come out.
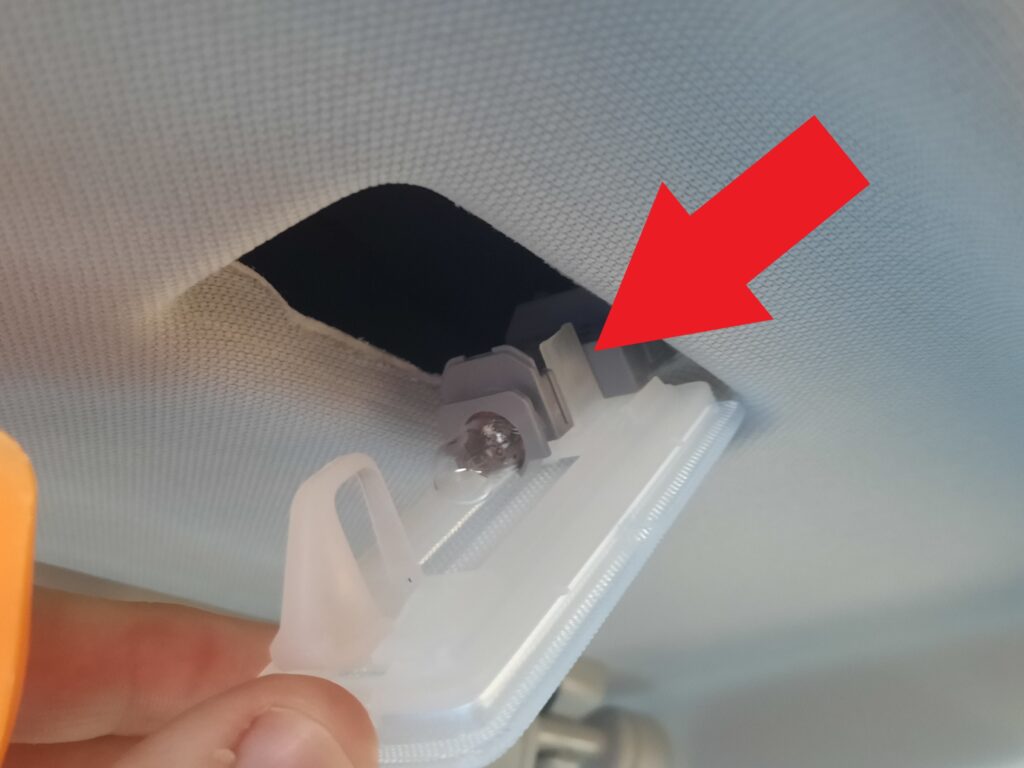
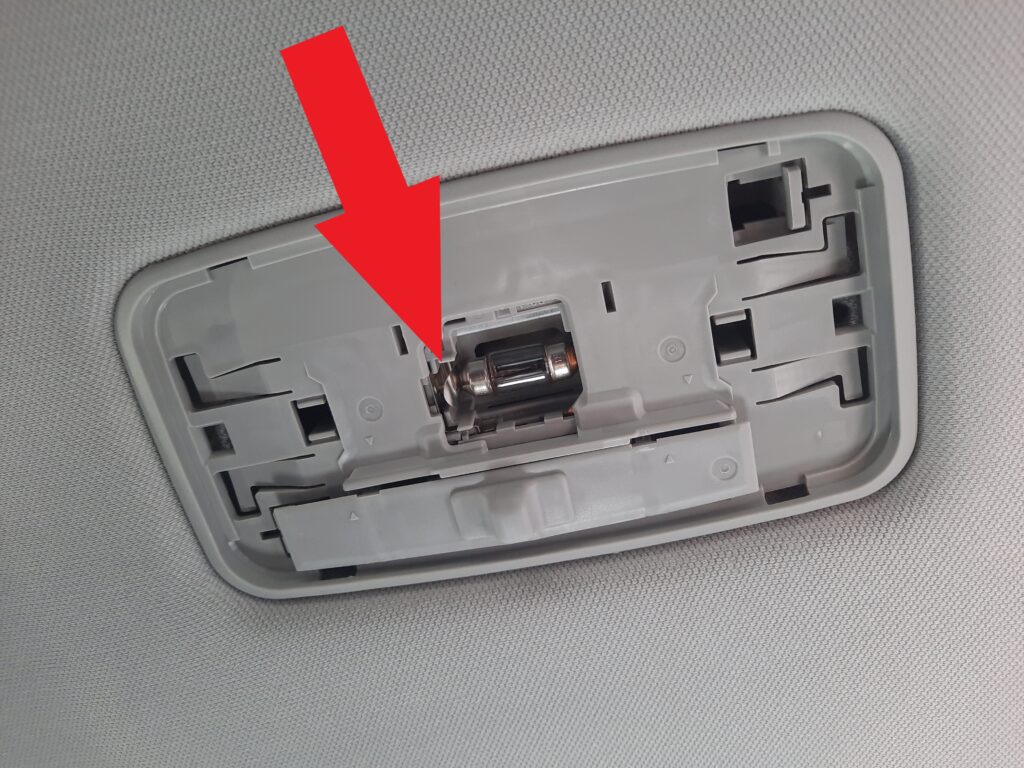
To remove the old dome light bulb, depress the metal holding the light in place and pull the bulb out.
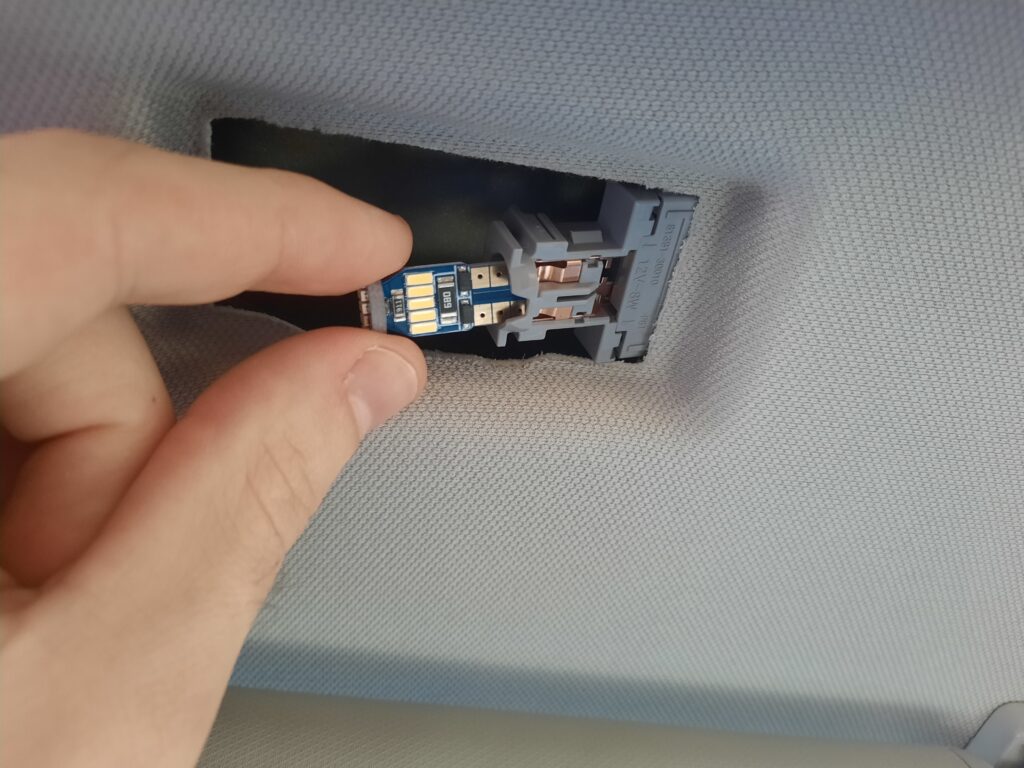
Insert the new LED light into the empty spot. If it does not stay securely in place, you may need to bend the metal piece outward so it has more tension on the bulb.
Remember: Test the new LED light before reinstalling the cover. If it does not work, trying flipping it around to reverse the polarity.
3. Installing the Cargo Area Light
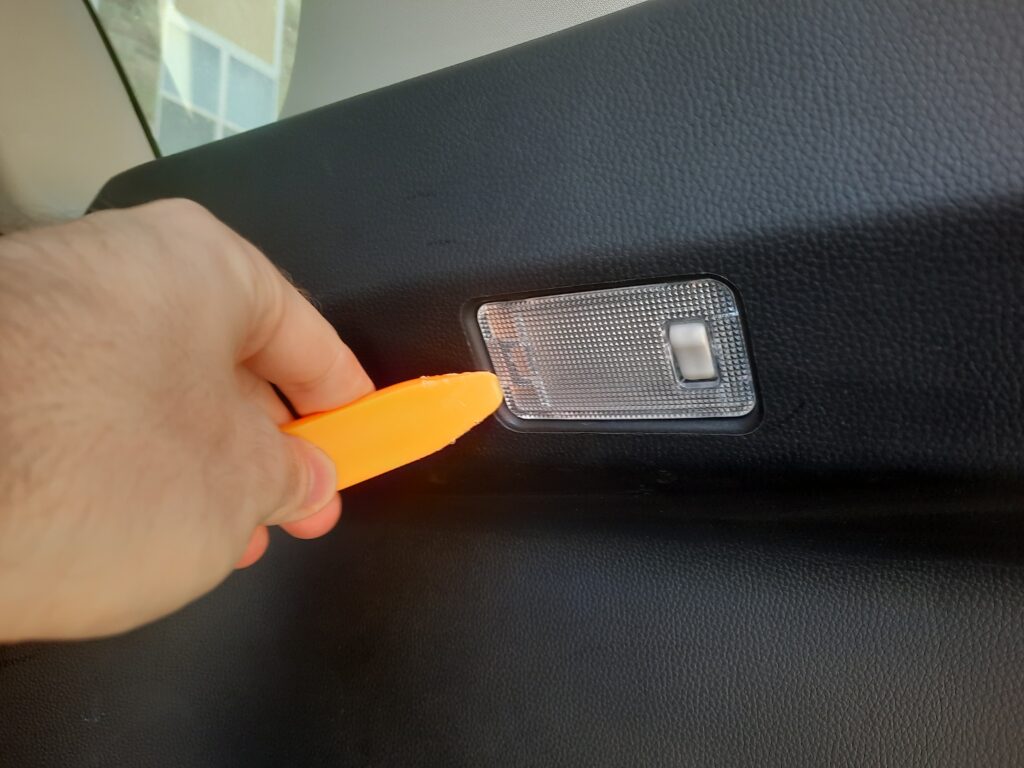
The cargo area light is located in the trunk on the right side.

You’ll want to pry the cargo area light from the left side, as shown below. It is fairly easy to release.
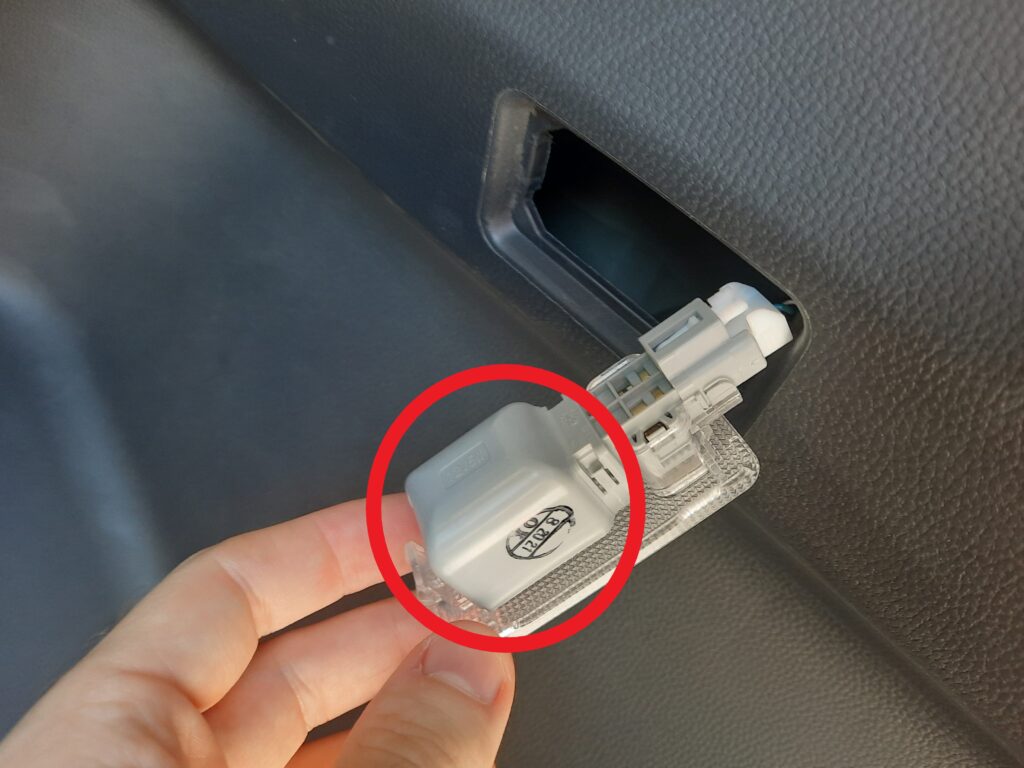
Popping out the cover will reveal the light assembly. You’ll need to slide off the cover circled below.
It’s not very easy to slide off this cover, so use the pry tool to help.
Once the cover is removed, wiggle out the old bulb and replace it with the new LED.
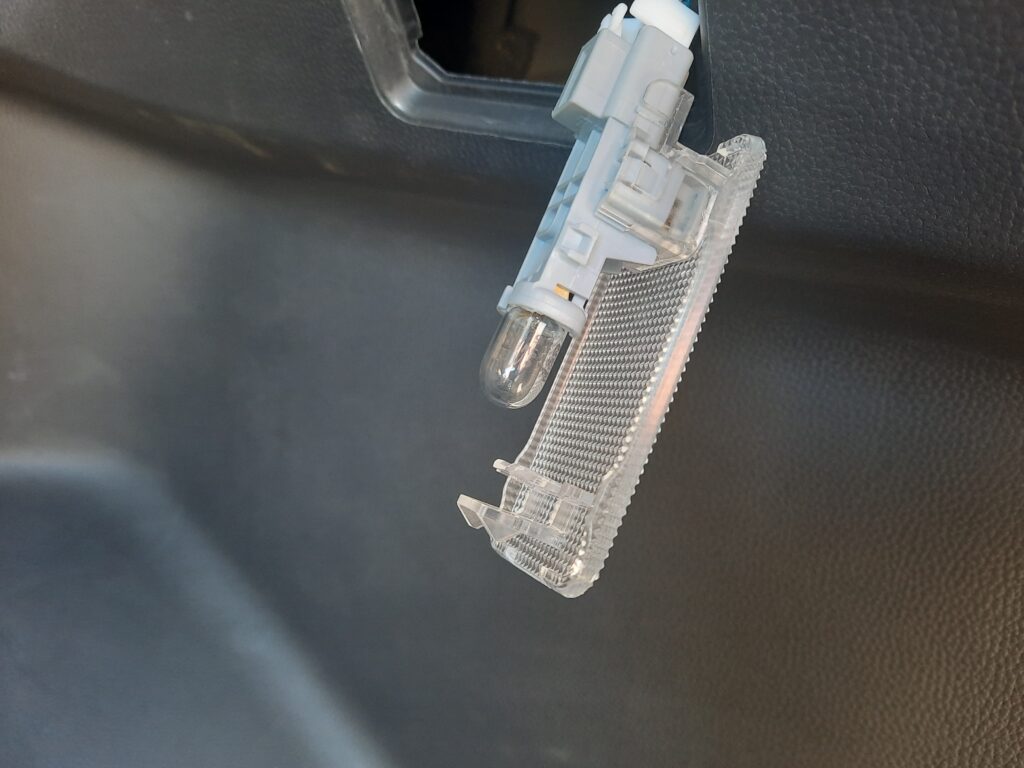
Before reinstalling the cover and light assembly, test the new LED to make sure it works.
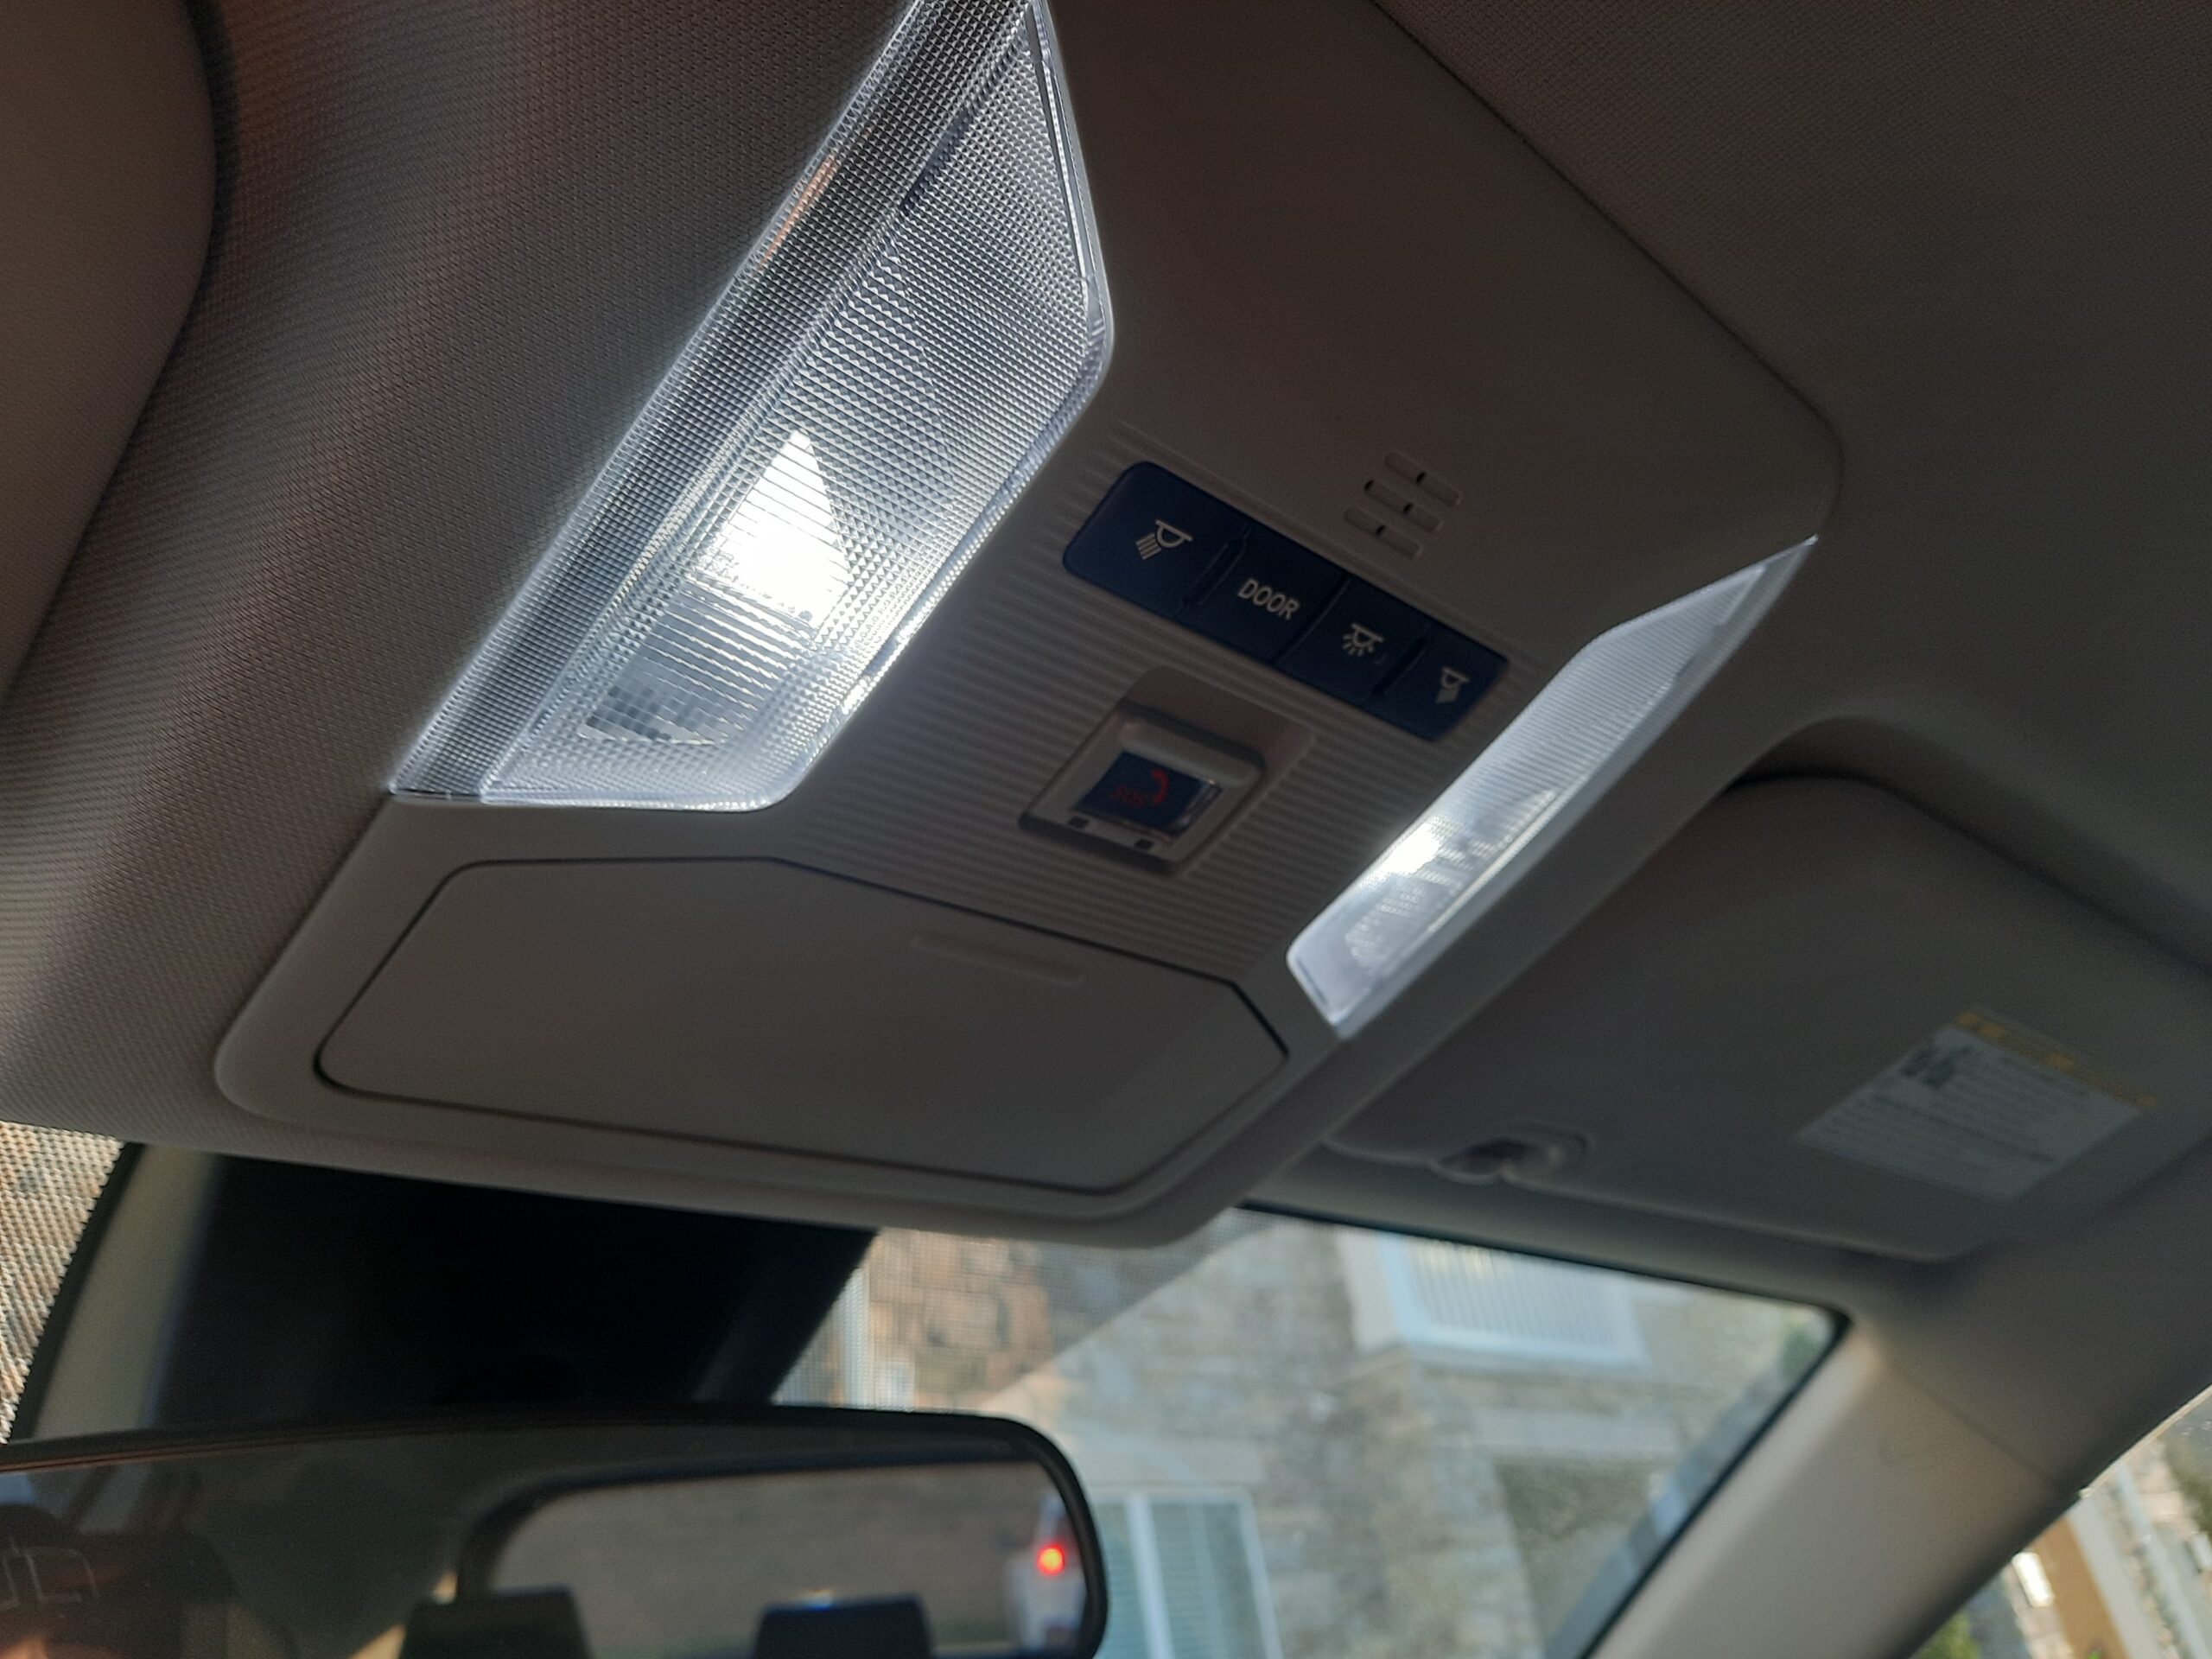
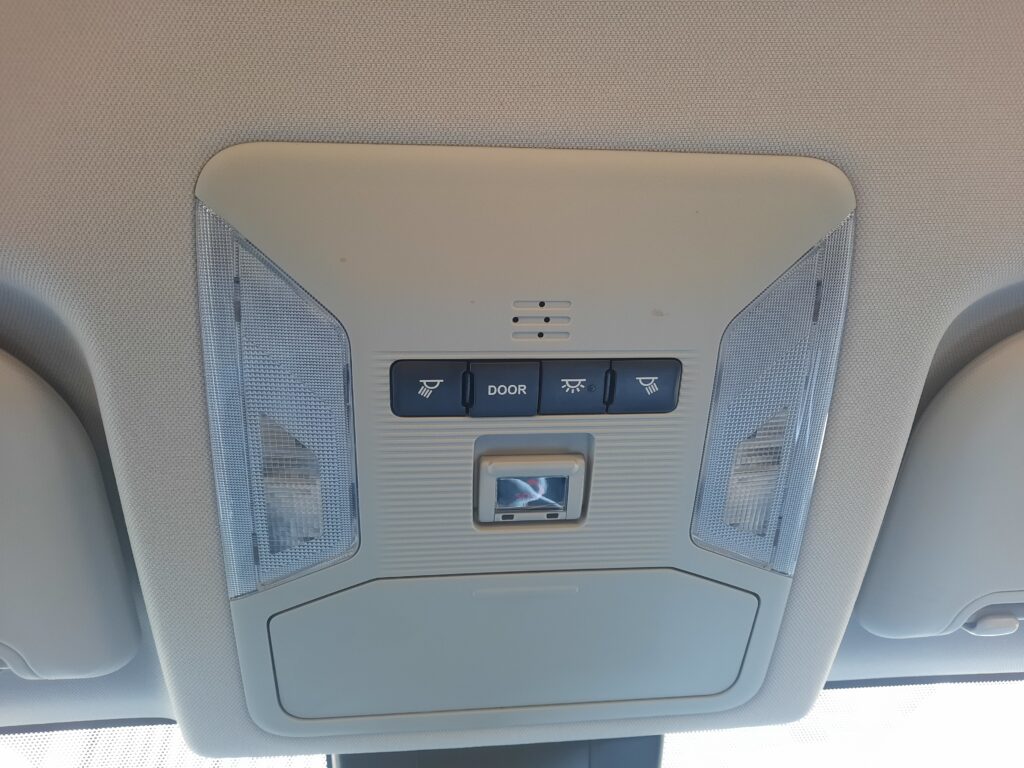
4. Installing the Map Lights
Alright, you may want to take a short break at this point. This next step will be pretty difficult if you’re not used to dealing with plastic automotive parts.
The two map lights are pictured below. It is built into a larger piece that includes various buttons and the sunglasses holder.
Before starting, you should be aware that the map light assembly seems to vary depending on model year, trim level, etc. However, the map light assembly seen in this tutorial appears to be the most common.
To minimize the risk of broken parts, I recommend removing the entire assembly. This will require great force.
It will be frustrating. It took me more than 20 minutes to finally get mine to pop out. It will feel like it is going to break, but that is unlikely. I’ll include some tips that helped me get it released.
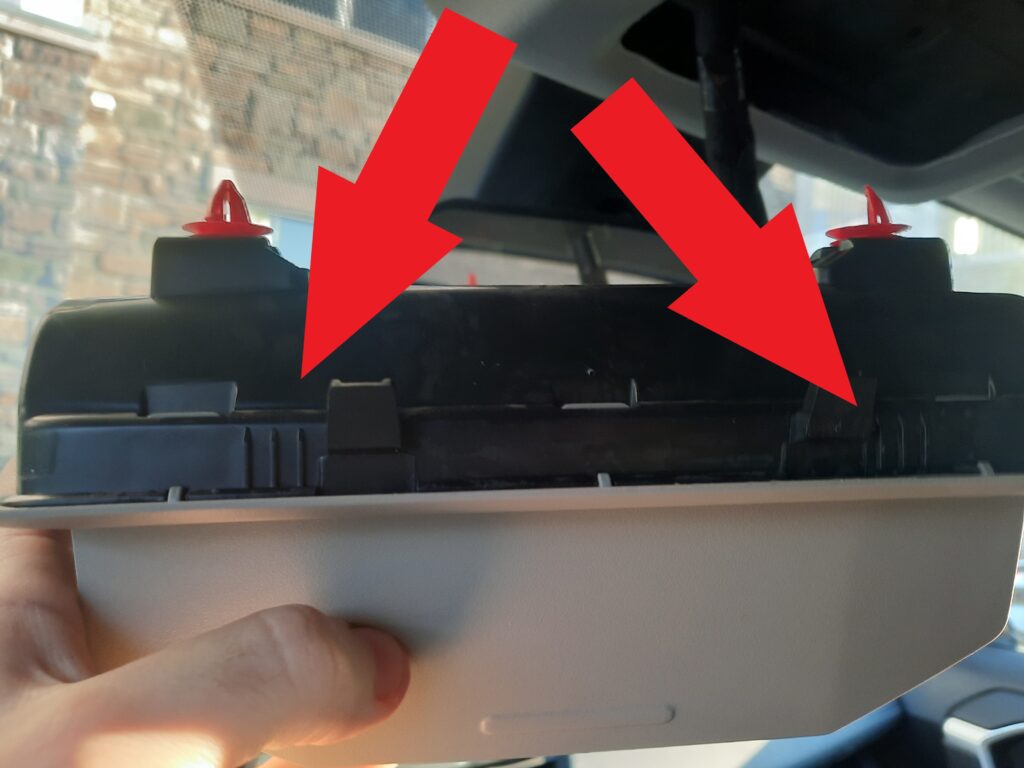
The right-side pry point for the assembly is pictured below. You should focus on these pry points on the left and right of the front part of the assembly.
By prying these locations, you’ll release the clips that hold the assembly in place. Keep scrolling for some more advice on releasing these clips.
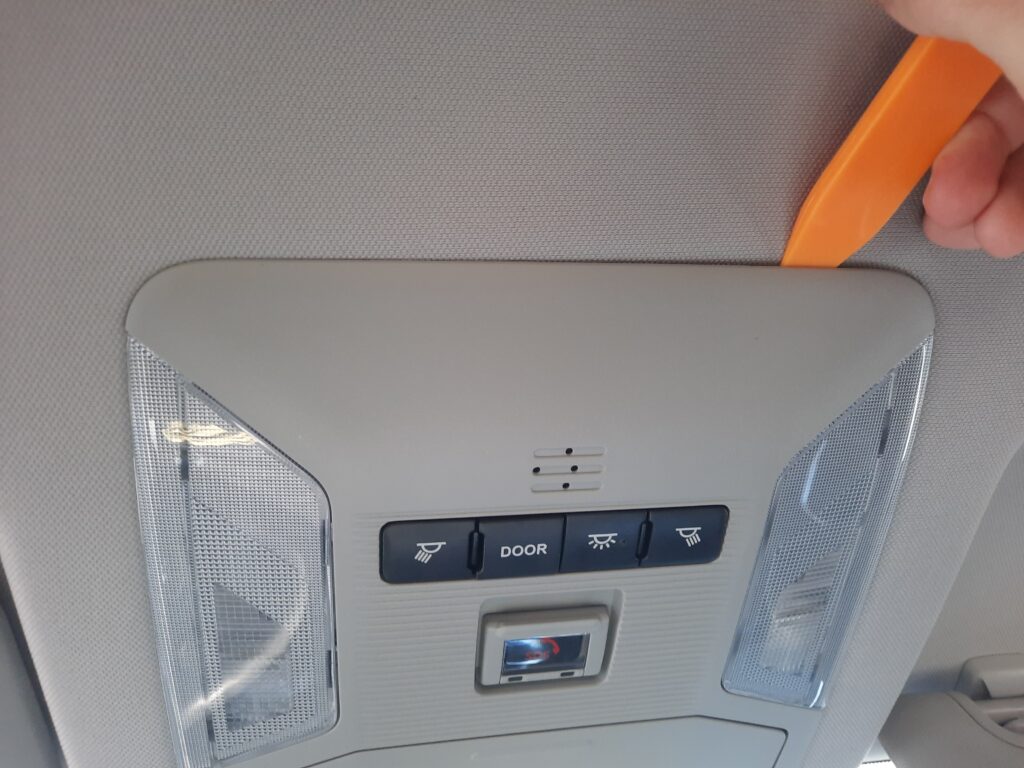
To get a better understanding of where the clips are located, insert the wedge into the map light assembly and look for three plastic lines peeking out from the headliner.
These lines can be used to help direct you into the proper pry point to release the clips.
Once you know where the clips are located, use the plastic wedge and your hands to pry the assembly loose.
You will need to use a lot of force. I recommend giving short bursts of force until it comes loose. It will probably drop down suddenly from the ceiling, so be prepared for that.
If you’re struggling with this and don’t feel comfortable, take it to a local auto shop. They can help you finish the job for little or no cost. If possible, visit a shop that specializes in accessories.
Once the map light assembly is removed, you’ll see two circular pieces for each light. These can be twisted out to release the bulbs.
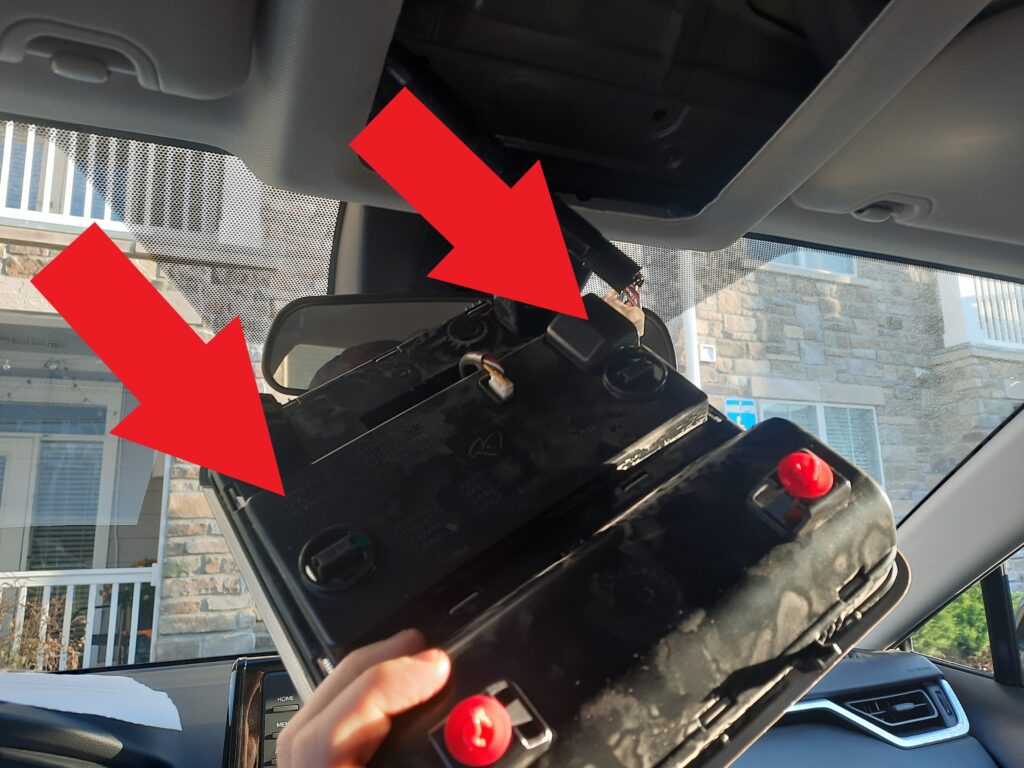
Remove the old bulbs and replace them with the new LEDs. Remember to test the bulbs before firmly snapping the assembly back into place.
Still Need to Purchase the Lights?
You Did It!
Congratulations, you’re new interior lights are now installed! Although the process is mostly easy, the map lights are quite difficult to deal with. I hope you were able to accomplish this without any issues.
If you have any questions, feel free to reach out to me and I’ll respond as soon as possible.
If you still haven’t ordered your LED light kit, you can do so here.